Knitting is a fun activity that keeps you busy for hours. But did you know there are different ways to knit without using needles? Finger knitting is the most straightforward technique I have come across that makes knitting fun for all ages. Knitting is a high-income skill nowadays, which you can learn on online learning platforms.
Finger knitting is perfect if you want to keep your kids busy and get them to learn a new skill. It is also ideal for beginners who would like to learn the basics of knitting before jumping in with the needles. All you need to learn how to finger knit are your fingers and a ball of yarn.
You can use any type of yarn, but I prefer a thick one (more than 8 plies). Thick chunks of thread are much more fun to finger knit with than thinner ones.
I’ve spent quite a great deal of time finger knitting with my niece this year. It was so much easier than regular knitting. And there were some creations we made in as little as 10 minutes.
It’s so easy that you only need to understand a few basic steps to learn how to finger knit. And in this article, we’ll discuss a simple technique you can use to knit with your kids. Here is how to finger knit using just your fingers and yarn.
Setting Up the Yarn
Before you get started with your finger knitting, you’ll need to set up the yarn on your hand.
- The most important thing about learning how to finger knit is understanding how to hold the yarn properly. If you’re right-handed, holding the thread between the thumb and the index finger of your left hand is best. Leave a few inches of the loose tail at the end. And keep your thumb and index finger pressed against each other to hold the yarn in place. Then flip your hand so that your palm is face up.
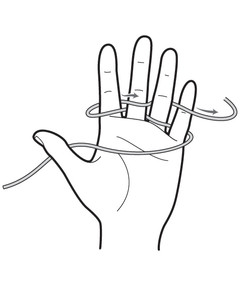
- Grip the loose end of the yarn tightly flanked by your thumb and forefinger. Now take the end still attached with the ball and start weaving it between your fingers. You’ll need to guide the yarn around the back of your index finger. And then over your middle finger, at the back of your ring finger, and finally over your pinky finger.
- Once you have reached your left pinky finger, simply loop it back around and keep weaving. This time the yarn should be threaded over your ring finger and around the back of your middle finger. Finally, you should wind the thread over the top of your index finger.
- When you reach your index finger, loop the yarn around again. Then keep weaving in the opposite direction toward your pinky finger. But this time, take the thread over your middle finger, behind your ring finger, and over your little finger. Loop it again and take the yarn over your ring finger, behind the middle, and over your index finger. Loop the thread of yarn on your index finger. Make sure you have two loops around each finger.
This is the fundamental step you should remember to learn how to finger knit.
Find a tutor for this topic
Start Stitching
Once you have set up the weave on your hand, the first step when learning how to finger knit is complete. Now it’s time to proceed with the knitting of your first loops.
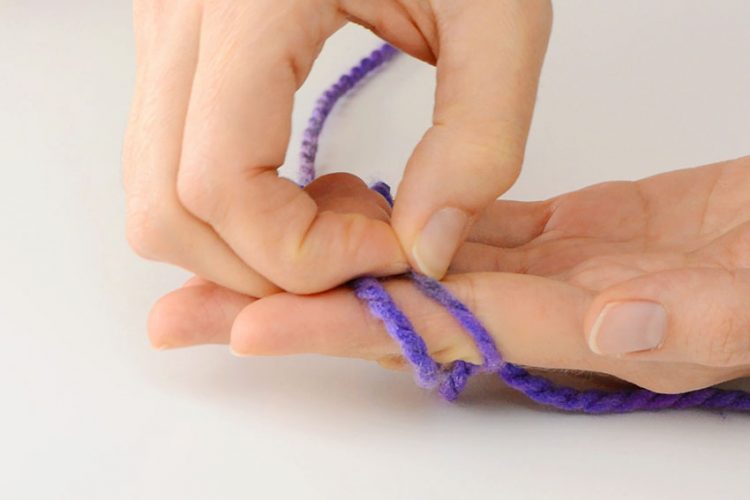
- Take the lower loop of yarn on your index finger and pull it up over the top loop and off your finger. The bottom loop should now be behind your index finger.
![finger knit stitch step 1]()
- Now repeat this same process with your middle, ring, and pinky fingers. Once completed, you should only have one loop on each finger.
- With your right hand, gently push the remaining loops towards the bottom end of your fingers. This will keep the loops more secure and prevent them from falling off your fingers.
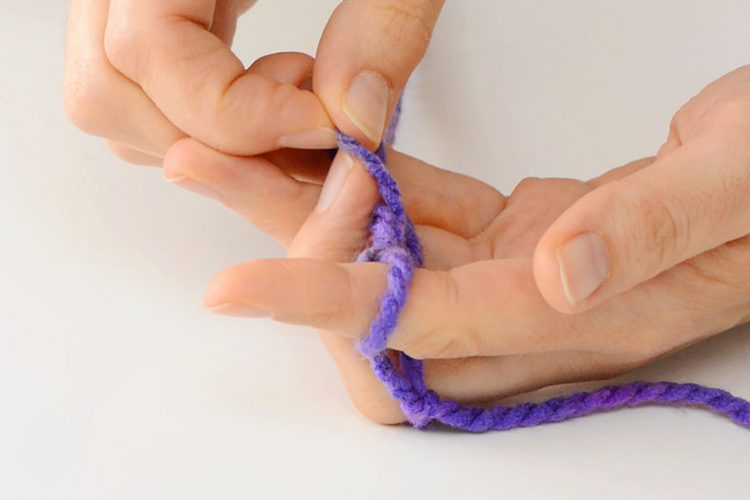
- Grab the tail of yarn between your index and middle finger and continue weaving as per step one. Take the thread over the middle finger, behind the ring finger, and over the little finger. Loop it up on the little finger and weaving it back.
![finger knit stitch step 2]()
- After this, you’ll have two loops on each finger again. Repeat the knitting process by pulling the bottom loop on your index finger over the top loop and then off your finger. Repeat the process for the rest of your fingers.
- Again, gently tighten and push the loops down your fingers towards your palm to keep them in place.
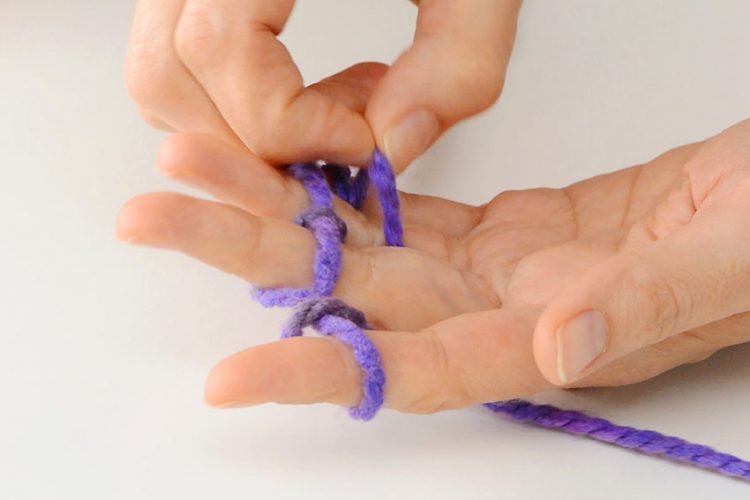
- Repeat the cycle of weaving, knitting, and tightening of yarn across your fingers. Do so until you have knitted a nice piece of knotted rope behind your fingers. Pull this weaved rope lightly to tighten it up as you continue knitting.
![finger knit stitch step 3]()
This is the primary stitching action you should remember to learn how to finger knit.
Cast Off
After you’ve finished knitting, it’s time to finish off your creation and cast it off your hand.
- The last step when learning how to finger knit is to take the weave off of your hands. Once the knitted section is the length you want it to be, stop weaving.
![finger knit tie off step 1]()
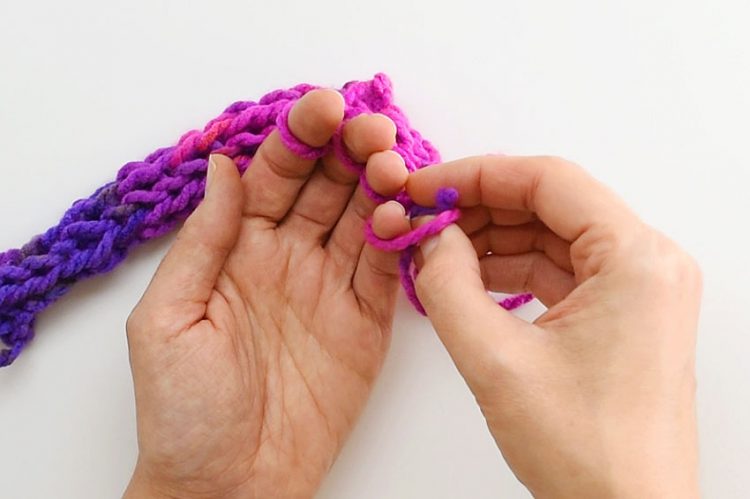
- You should have one loop left on each of your fingers. Now, take the last loop from your left index finger, flip it up, and pass it over to the middle finger.
- You’ll now have two loops on your left middle finger. Pull the bottom loop over the top loop and off your finger. Then place it at the back of your hand.
- Take the last loop on your middle finger, flip it up, and pass it over to your ring finger.
- Now, you have two loops on your ring finger. Pull the bottom loop over the top one so that it is off your finger. Then place the loop at the back of your hand.
- You should now only have one loop left on your ring finger. Take this loop, flip it up, and pass it over to your little finger.
- Again, pull the bottom loop on your little finger over the top loop and off your finger. Then place it at the back of your hand.
- You should now have just a single loop on your little finger. Carefully pull this last loop off your finger and hold it firmly. Do not let the loop close once you have taken it off.
![finger knit tie off step 2]()
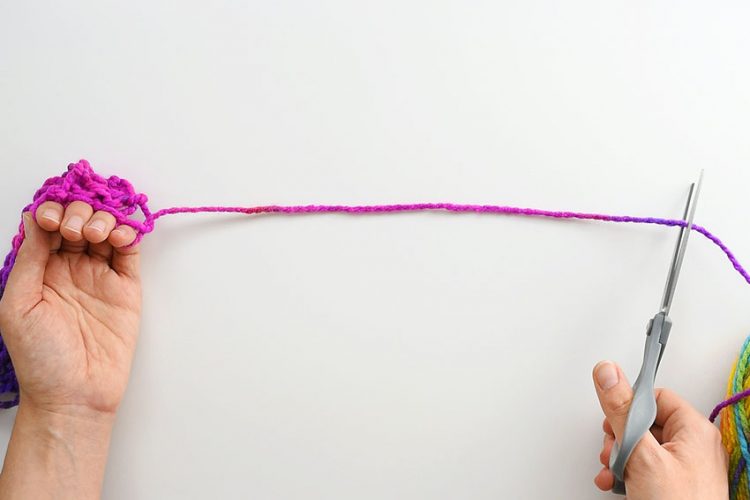
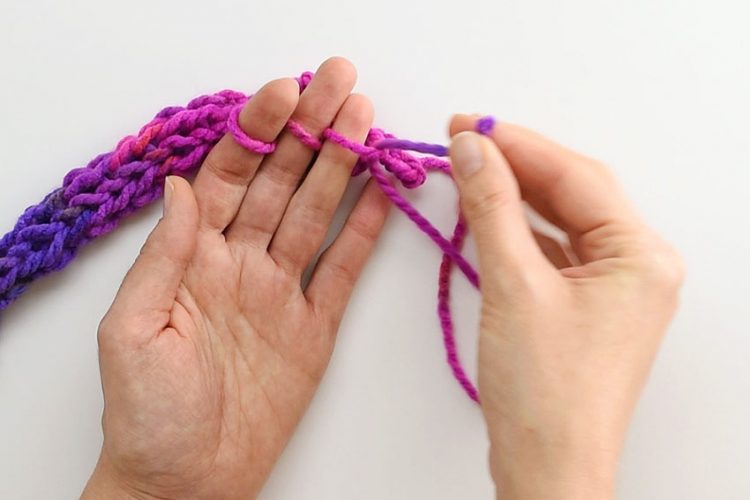
- Now cut the end of the yarn still attached to the ball. Make sure you leave at least 4 inches at the end.
- Take this end of the yarn and pull it through the last loop. Tug at it a few times to tighten up this loop.
![finger knit tie off step 3]()
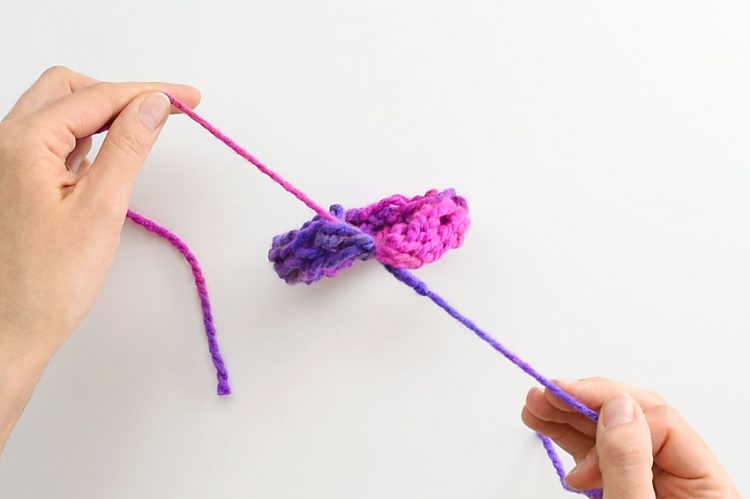
- Now, hold both ends of the yarn and pull them up to tighten off both ends.
![finger knit tie off step 4]()
Final Words on How to Finger Knit
I prefer to carry out my finger knitting projects in one sitting. It’s effortless and usually doesn’t take more than 10 or 20 minutes to complete. However, if you must leave the knit halfway through, you can slide a pencil or a knitting needle through each loop. Simply slip the loop off your fingers and slide your placeholder in.
Once you are ready to continue your project, slide each loop back onto your fingers and continue knitting. You can also learn how to finger knit from experienced knitters on Lrnkey and learn more about the process.
Finger knitting is a fun, creative, and easy activity that you can take up with your kids. They’ll learn a new skill and make adorable creations for themselves.
You can also use a shaded yarn ball to create a beautiful effect on your knitted masterpiece. By connecting with fellow knitters on knitting forums, you can learn more about how to finger knit.
Anahit Babkenyan
Anahit Babkenyan is a Content writer at Lrnkey.com. Writing enthusiast and travel writer. She is a life-long learner and writes articles with profound research.