Top Cool & Useful Websites for Individuals and Businesses
Discover 10 innovative websites like White Screen Test Tool and Shopify that boost productivity, enhance work efficiency, and simplify daily tasks for individuals and businesses.
Create learner account
Lrnkey
2022-02-08Explore more than 500+ high-income skills with highly motivated tutors
Would you like to learn how to make polymer clay jewelry pieces? Using this type of clay can produce beautiful and affordable jewelry that’s easy to make. In fact, polymer clay is one of the most accessible and versatile jewelry-making materials.
When determining how to make polymer clay jewelry, one must first understand your materials and tools. Selecting the correct type of polymer clay for your project is the first step. After that, you must learn how to soften, colour, mould, and bake the clay as needed. And you’ll need to develop the skills to smooth and finish off your polymer clay pieces once baked.
You can combine jewelry pieces made of this clay with other jewelry styles, like beading, to create more complex and beautiful trinkets.
With this helpful guide on how to make polymer clay jewelry, you can learn the basic techniques and all the little tips and tricks that will help you make pretty jewelry pieces out of this material.
So, let’s dive in and get to the basics of how to make polymer clay jewelry clarified.
Polymer clay is a popular modelling clay known for its flexibility, versatility, and simplicity. It is made from vinyl and is excellent for crafting jewelry pieces. It does not dry out and stays soft until it’s baked in a home oven.
You can make many things from polymer clay, from cute animal figures for your children, vintage-style brooches, to colourful and beautiful earrings. The best thing about this clay is blending it into hundreds of colours and textures.
After getting baked, the clay retains its shape and size, making it a popular choice for beginners and professional jewelry makers. Today we will delve into how to make polymer clay jewelry in a few simple steps.
Choosing the Correct Clay Type for Making Jewelry
Choosing the correct clay type is essential while learning how to make polymer clay jewelry. Your clay should be soft enough to be kneaded and mixed with hands, but it should also be firm to hold on to your intricate jewelry designs. The clay you choose should also be durable enough, so your jewelry pieces do not break easily.
There are a variety of brands in the market that offer polymer clay for making jewelry. Here are a few that I have tried and liked while making earrings.
Premo Sculpey
Premo Sculpey is the best polymer clay brand while exploring how to make polymer clay jewelry. The clay has a nice and firm texture to accurately hold all the intricate designs and details. It is flexible as well and can be easily mixed and sculpted. Premo Sculpey is available in a wide range of colours as well. Its supple and firm texture ensures the durability of your jewelry pieces.
Kato Polyclay
Kato Polyclay is the first brand of polymer clay introduced by an artist. It has a non-sticky formula to ensure that the clay’s colours do not stain your hands or work surface. The clay is available in multiple colours and can be mixed and blended to create personalized gradients.
Fimo Professional Polymer Clay
Fimo professional polymer clay is the ultimate material to work with while learning how to make polymer clay jewelry. The clay is quite flexible, and you can quickly form different jewelry and decorative items. Its non-sticky property makes sure that it does not stick or leave stains on your workstation. They are available widely in the market and come in multiple colour options. It is the perfect clay to make marbled jewelry pieces.
Find a tutor for this topic
The first step in discovering how to make polymer clay jewelry is gathering all your supplies. When you have your supplies ready on the workstation, you can create tens of jewelry pieces in a matter of minutes.
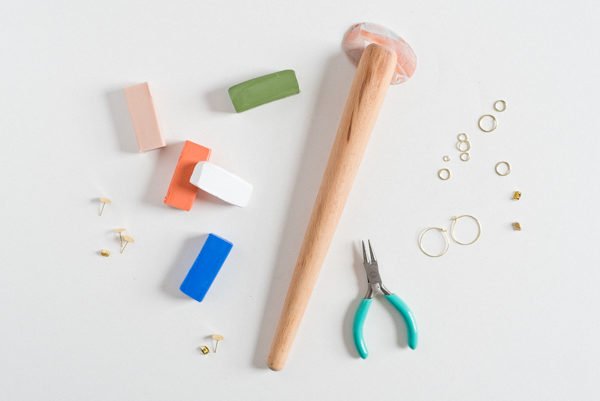
You’ll need parchment paper, flexible superglue, earring backs (like hooks or hoops), and polymer clay to make jewelry pieces from this clay. In addition, you should have a rolling pin, craft knife, cookie cutters, jewelry pliers, toothpicks, and a flat baking sheet.
If you don’t have these specific tools, you can substitute them with similar devices from your toolbox or kitchen. Additionally, if you make earrings, you can look for cute and creative cookie cutters or stamps on Etsy.
Before you start making your jewelry out of polymer clay, you need to soften it a bit. An essential step in learning how to make polymer clay jewelry is the conditioning process. By conditioning your clay, you will make it softer and more flexible. It will help you shape your clay easily.
The best way to condition your clay is by rolling it on the table and kneading it between your hands. You will need to knead the clay for a few minutes before it starts to get softer. Alternatively, you can also run your clay through a pasta machine a couple of dozen times.
You will know that your clay is well conditioned if you can roll out a long coil of clay and bend it without any rough edges or cracking. While kneading your polymer clay, whether by hand or a pasta machine, make sure there are no air bubbles. It is a critical step in determining how to make polymer clay jewelry. If you do encounter some, pop them with a toothpick.
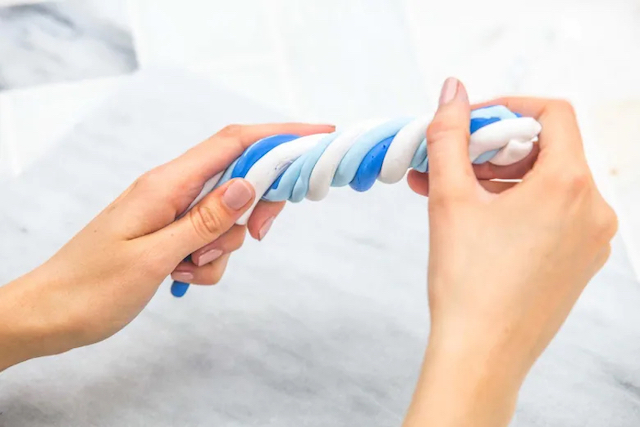
Once you decide what colours you need to use for your jewelry pieces, you should knead all of them and put them aside. Now it’s time to mix up colours with a few different techniques.
This technique helps to create a marbled effect with your clay. It will help if you try this technique while learning how to make polymer clay jewelry.
Once you have mixed your clay, it is time to start making your jewelry out of it. In this guide on how to make polymer clay jewelry, we will be focussing on earrings. They are fun and easy to make for beginners.
After cutting out your desired jewelry pieces, it is time to finalize them by baking them in a home oven. Set up your oven correctly, as it’s a crucial step while understanding how to make polymer clay jewelry.
fter your polymer clay jewelry pieces have cooled down, it is now time to smoothen them and add the final touches. When you are learning how to make polymer clay jewelry, it is necessary to smooth your pieces down and add your final touch.
You can use fine-grid sandpaper to rub all the sharp edges of the clay to smooth them down. You can also use a Dremel tool to smooth the edges. Professional jewelry makers use Dremel tools as they have many batches and less time.
To smooth the surface of your jewelry piece after baking, you can dip a cotton swab in acetone. You can then slowly rub it over the parts to brush away any excess dust or fingerprints.
Once you have made your jewelry pieces ready, it is now time to add the hooks and finalize your pieces. To add jump rings to your earrings, you need to add them to the smaller circular rings. These rings would then be attached to the tiny holes you created on your jewelry pieces before baking them. Use a plier to close off the opening of the earring, so it does not come off while you are wearing them.
If you want to add a little more charm to your jewelry pieces, you can add hoops instead of hooks or add tassels with embroidery floss.
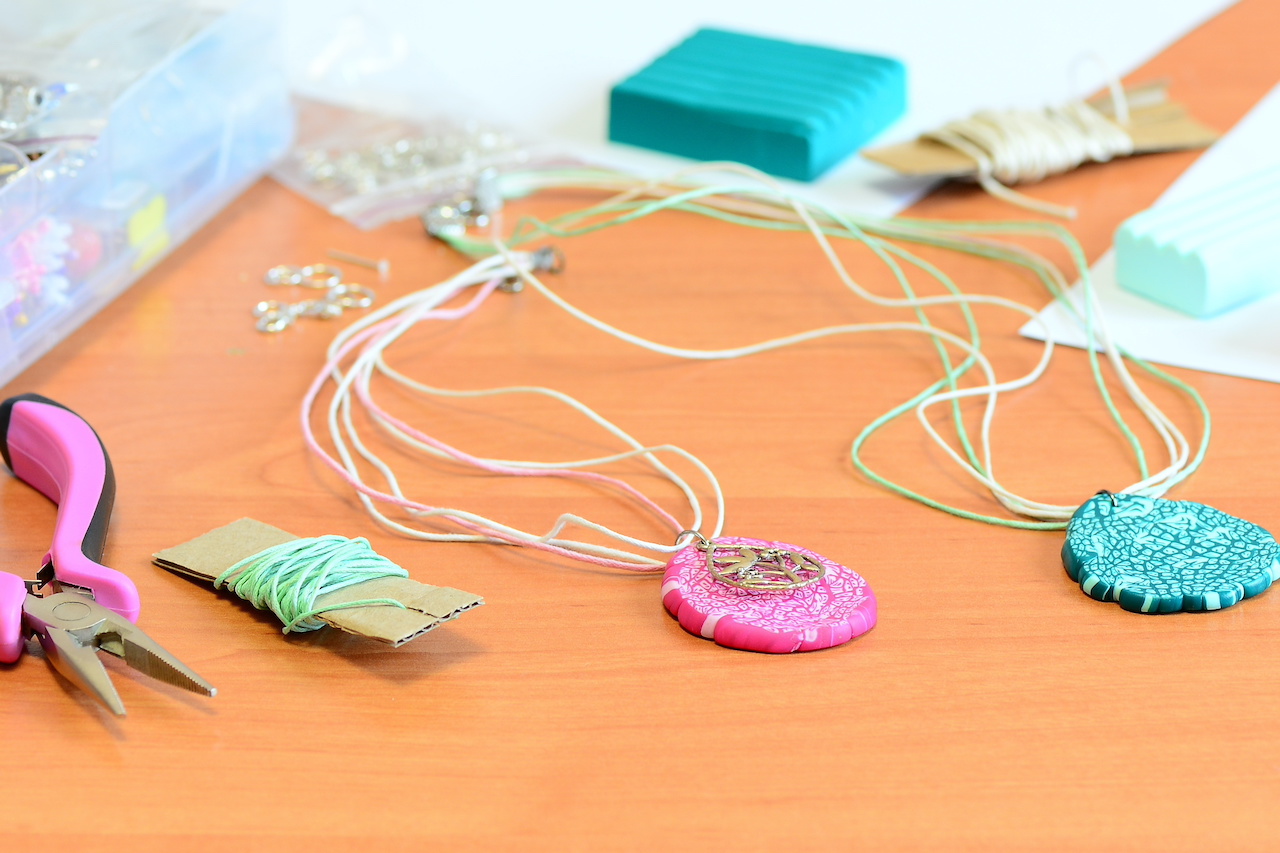
Polymer clay is quite a versatile jewelry-making technique that you can use for making multiple pieces like necklaces, earrings, or bracelets. Here are a few projects you can try on with our how to make polymer clay jewelry guide.
One of my favourite polymer clay projects is a hand-crafted marbled necklace. I prefer adding a few metal beads to make them look more alluring.
You can also try making beaded bracelets purely out of polymer clay. You can do this by making small marble-size circles and piercing a hole through them. You can use this hole to attach a memory wire, thus creating a funky bracelet.
Earrings are everyone’s favourite project while using this clay. You can make thousands of shapes by using a cookie cutter or even your kitchen knife. The best part about carving earrings has multiple pieces from a single batch.
Perhaps you want to start a small business and learn more advanced levels of how to make polymer clay jewelry. In that case, you should look for a professional course. You might find a few random videos online. But a structured course would help you refine your skills and give you a better understanding of the craft.
By taking a 1:1 lesson with an online tutor, you will learn from their experience. Additionally, you will be a part of the community and meet people with similar interests, allowing you to take inspiration from their work.
Lrnkey, an online tutoring platform, offers online tutorials for beginners and advanced jewelry makers. These one-on-one lessons hosted by expert tutors will help you learn everything there is to make polymer clay jewelry.
The best part about this type of clay is the variation of colours, patterns, and designs. You can look up the internet and some social media websites like Instagram or Pinterest while learning how to make polymer clay jewelry and draw inspiration from them. They will give you a fresh perspective on the designs that you can try out.
Making jewelry with this clay is a fun hobby. And it can be turned into an exciting business idea if you keep learning and perfecting your skills. With this brief guide on how to make polymer clay jewelry, you should be familiar with the process and the supplies you will require. And you ought to be well on your way to crafting jewelry your friends, family, or customers will adore.


Explore more than 500+ high-income skills
Practice with experienced tutors
Book your first free lessonAre you a robot?