5 Reasons Field Technicians Must Continuously Upgrade Their Skills
Discover why investing in continuous learning for field technicians is essential for business growth. Learn how e-learning platforms can help your service business stay competitive.
Create learner account
Lrnkey
2022-02-08Explore more than 500+ high-income skills with highly motivated tutors
Have you always wanted to learn how to make a necklace? There is nothing better than customizing your neckpieces to fit your personality and aesthetic. The right piece of jewellery can add a sentimental touch to your outfit. However, it’s not always possible to find a necklace that fits your personality. You can avoid this by learning how to make a necklace.
There are a few simple steps to take while learning how to make a necklace. You’ll need to plan out your project and gather your supplies accordingly. You can try out a beaded or a pendant necklace for your first project. You could also try your hand at a floating bead necklace if you are looking for something more unique.
Creating your own jewelry and necklaces can be a fun experiment. Once you know the basic techniques, you can create neckpieces from almost any decorative items like beads or shells.
We have a brilliant guide on how to make a necklace that will help you start your jewelry-making journey. We cover everything from planning out your project gathering your supplies to different ways you can create a unique necklace.
So, let’s dive in and learn how to make a necklace.
Before you can start making your neckpieces, you need to plan it out in your mind. This will help you analyze all supplies you will need for your project. If you start making necklaces without any design in mind, there is a good chance that you’ll end up all confused.
You can look up inspirations online and draft a rough sketch of your necklace while learning how to make a necklace. Based on this outline, you should decide on the supplies you need for your necklace project.
According to Nyla Rose, a beauty and fashion consultant at Stylorize, taking time to plan your necklace design is crucial. She recommends gathering inspirations from various sources like nature, online platforms, or even heirloom pieces to create something uniquely yours.
Options and designs of creating your own necklace are endless. You can pick up wooden beads and string them together to make a boho necklace. You can also use your old brooches as necklace pendants and create a vintage necklace for yourself.
While learning how to make a necklace, planning out your design is crucial. Once you know what you’re going to use as a decorative item, you can gather your supplies. Apart from them, there are a few essential pieces of equipment that you should keep handy while learning how to make a necklace.
Once you have planned out your necklace design, it is time to start making a unique and beautiful necklace for yourself. This section of how to make a necklace will discuss interesting techniques of this DIY project.
Find a tutor for this topic
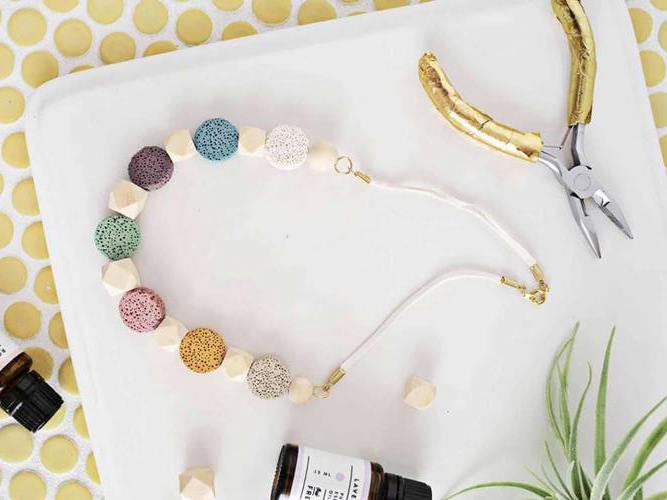
Beaded necklaces are one of the easiest and most popular necklace-making techniques. All you need is beading thread, wire cutters, beads of your choice, and closure or clasp.
It’s time to make a beaded necklace in this section of how to make a necklace.
Pendant necklaces are usually statement pieces and look good no matter what you wear them with. While learning how to make a necklace, you should try out these types of necklaces. All you need is a chain or fabric cord, wire cutters, pendant, and lobster clasp.
It’s time to make a pendant necklace in this section of how to make a necklace.
Making a necklace out of stones or tassels gives your finished piece a modern and minimalist look. All you need is a crystal of your choice, adhesive, bamboo skewer, bead cap, embroidery thread, connecting ring, and a chain. First, you should plan out your design and create your necklace piece.
It’s time to make a stone and tassel necklace in this section of how to make a necklace.

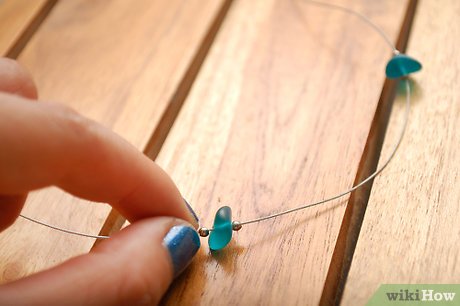
A floating bead necklace is an eye-catching piece that you can customize to your liking. All you need is a thin nylon or steel cable, crimp beads and stone or glass pearl beads. You’ll also need a clasp, jump rings, wire cutters, and crimping pliers.
It’s time to make a floating bead necklace in this section of how to make a necklace.
Seashell necklaces make a beautiful and unique piece of jewelry. You can customize your own necklace the way you like and wear it on a beach or a hot summer day. While learning how to make a necklace, this is one of the most accessible types. You will need seashells, additional decorations like beads, a durable necklace cord, jump ring, clasps, drill and a drill bit, and a pair of nose pliers.
Before you can start making a shell necklace, you need to pick up shells that you will add to your necklace. You can select different types, colors, and sizes of shells. This is just a matter of personal preference.
If you want to make a pendant necklace, choosing a slightly bigger shell would be a good idea. However, if you’re going to create a bold necklace, you can add multiple medium-sized shells to your neckpiece.
When you learn how to make a necklace, you can be more creative and add other decorations to your seashell necklace. You can either add a group of tiny beads or alternate your seashells with larger beads. It all depends upon the design you have planned.
Coming to the base of the necklace, you can decide to go all beachy and eco-friendly and use a jute string. If you want your necklace to be more durable, you can choose metal chains made out of silver or gold.
It is now time to assemble your seashell necklace in this section of how to make a necklace.
Learning how to make a necklace is a great DIY activity for creating customized neckpieces based on your personality and style. If you want to learn more about necklace techniques, you can take a 1:1 lesson from an online tutor. This will help you be clear with the basic techniques and the small tips and tricks.
Lrnkey, an online tutoring platform, offers online tutorials for beginners and advanced jewellery enthusiasts. These one-on-one lessons hosted by expert tutors help you learn everything there is to make a necklace or other jewellery pieces.
To make a simple necklace you’ll need:
To make a necklace you can use lots of different materials. Some of our favorites are:
To make a simple necklace chain you’ll need interlocking metal links or wire. It’s not easy to piece together all of the small links and you’ll want to make sure the metal or wire you are using is firm enough so it doesn’t bend and lose grip on the other chain links.
To make a string necklace get some string, beads and charms, scissors, and some clasps. Attach one clasp to the end of the string. Then string your beads and charms in a beautiful pattern onto the string until it’s full. Then attach the other clasp to the final end of the string so the beads don’t fall off.
To make a pendant necklace get a wire or string and attach a clasp to one end. Then string on the pendant you want to use. You can allow the pendant to swing along with the necklace freely or you can keep it in place by putting small tight beads or crimped stoppers on both sides of the pendant so it doesn’t leave its place on the string. Last, attach the other clasp to the final end of your necklace.


Explore more than 500+ high-income skills
Practice with experienced tutors
Book your first free lessonAre you a robot?