The Future of Education: Trends to Watch and Adapt To
Discover emerging education trends, from tech integration to personalized learning, shaping the future. Adapt to stay ahead in the evolving educational landscape.
Create a student account
Lrnkey
Dec 29, 2021Explore more than 500+ high-income skills with highly motivated tutors
Learning how to knit from scratch might sound a little overwhelming to beginners. Knitting can be fun and useful for some and a relaxing hobby for others. With all the options available today, you can get confused about where to start. But we don’t want you to feel that way.
We have compiled a brilliant guide on how to knit for beginners that will help you start your knitting journey. Our guide covers everything, from choosing your yarn and holding your needles to some of the first projects you can take up. We’ll even help you cast that first stitch and give you pointers on how to execute the three basic types of stitches.
People have loved knitting for centuries, and today you’ll figure out why. So, let’s dive in and get our basics of how to knit clarified.
Before you can start to practice your knitting stitches, you’ll need to choose your needles and yarn. It’s just that simple. With endless options on the market, you can pick up acrylic, woollen, cotton, ribbon, or even mixed yarn.
And when we talk about needles, you can either start with wooden or steel ones. But which one of these is the best for beginners?
Selecting the perfect yarn to start practicing your knitting is the crucial step in learning how to knit. We always recommend you choose a medium weight or a chunkier yarn. Selecting light colours like lemon yellow and baby pink can help you observe your stitches and catch any mistakes you’re making in the process.
Woollen yarns are much easier to knit with compared to acrylic and cotton yarns. Wool tends to be smooth and super stretchy, making it the perfect choice for beginners. There are both pros and cons of using cotton and acrylic yarn, but they are best suited for advanced knitters.
While you are learning how to knit as a beginner, choosing the correct needle type and size is extremely important. Most experts prefer starting with either a bamboo or a wooden needle. These needles help to hold the stitches better as compared to other materials.
As a beginner, wooden or bamboo needles are much more comfortable to hold and knit with, unlike plastic or aluminum needles.
The width and the length of your knitting needles will also affect your knitting experience. Using a medium-sized needle would be perfect for a beginner. This means you should select a width between 4mm and 5mm, and a length of about 10 inches.
As you advance and knit more complicated projects, you might need longer needles. Once you have gathered your supplies, it’s time to move on. Next, we’ll explore the actual stitching in our guide on how to knit for beginners.
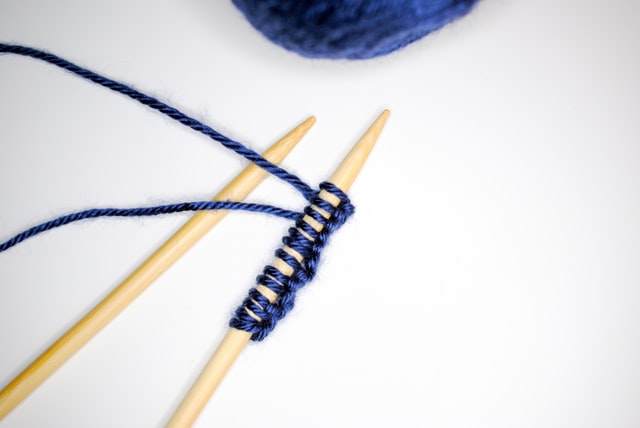
The first thing you need to learn is how to tie a slip knot. It is the starting point of your knitting project. This knot can easily be loosened or tightened up by pulling on one strand.
Once you know how to make the starter knot, it’s time to cast a few stitches onto your needles. There are a few different types of casting-on techniques that you can try out while learning how to knit.
One of my favourites is the longtail cast-on. You can use this easy-to-learn and straightforward method to create a stretchy cast for most of your knitting projects. It also makes a clean, neat edge on your knitted project.
Before starting the longtail cast-on technique, leave a strand of the tail at the end of the yarn. The length of this tail will depend upon the number of stitches you will cast onto your needle.
For example, if you want to cast ten stitches onto your needle, you should leave about 1 foot of yarn at the tail.
Find a tutor for this topic
While casting on your stitches and learning how to knit, make sure you don’t cast them on too tightly or loosely. If your initial stitches are too tight, it will be impossible for you to work with these stitches. It can also leave a crumpled look to the edge.
However, if you cast the stitches on too loosely, it will create gaps between your stitches, making them look uneven.
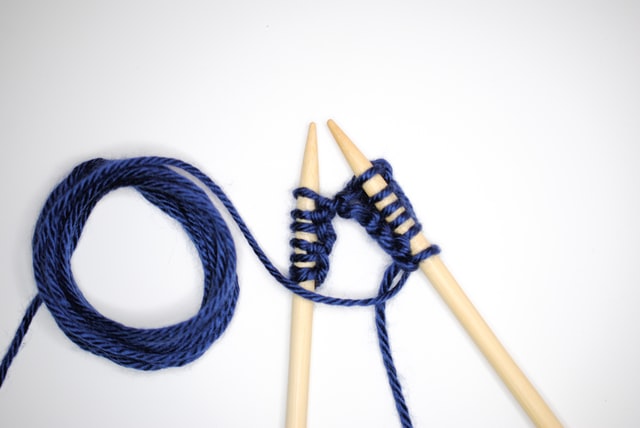
You’ve cast the first row of stitches onto your needle. Now it’s time to continue knitting and learn a few basic stitches.
While you’re learning how to knit, there are some knitting techniques that you should be familiar with from the start. Knowing these will help you knit your first few simple projects.
Before starting the knitting process, you should transfer the right needle with the stitches into your left hand. Your right-hand needle should always be empty, so you can grip and stitch your knots with it.
Knowing the purl stitch opens the doors to tons of knitting patterns. You can knit up hats, gloves, and cowls with this type of stitch. But it’s the opposite of the basic knit stitch.
Garter stitches create a stretchy fabric that lays flat and does not curl up on the edges. It is one of the most common and straightforward stitch patterns for beginners, which is fully reversible.
 Once you complete the first garter stitch row, switch your needles. Hold the empty one in your right hand and the one filled with stitches in your left hand. The garter stitch is perfect when you are learning how to knit as a beginner. And it’s ideal for knitting scarves, hats, bags, and blankets.
While you’re knitting your project, there’ll be a time when your ball of wool will come to an end. Learning how to knit and join a new ball of yarn is crucial to the overall look of your project.
Here are a few ways to join a new ball of yarn to your knitting fabric quickly.
Joining the yarn using a knot is the simplest method you can use as a beginner. All you must do is take the old and new strands of yarn and tie them together. You can use this to join the new thread while practicing your knitting techniques.
However, this is not the best way to join yarns. When you simply tie the two threads together, there’s a chance that the knot will appear at the front of your finished work and spoil the look of your piece. The knot can also pull out the stitches surrounding it and unravel your knitted work.
This is one of the easiest methods when joining yarn to your knitting project while learning how to knit. All you must do is continue weaving as if there was no yarn break at all.
A Magic knot is a much better and more robust way to join the two ends of your yarn. There is a tiny chance it might crawl its way up to the front of some stitches. But it will never loosen up the surrounding stitches and unravel your work. You can use it for garter stitch projects while learning how to knit.
Once you have completed your knitted project and are happy with it, it is time to cast the stitches off your needle. You can use a few different methods to end off your project while learning how to knit.
The standard cast-off method is the easiest one of them, sealing off your stitches neatly and ensuring they don’t unravel.
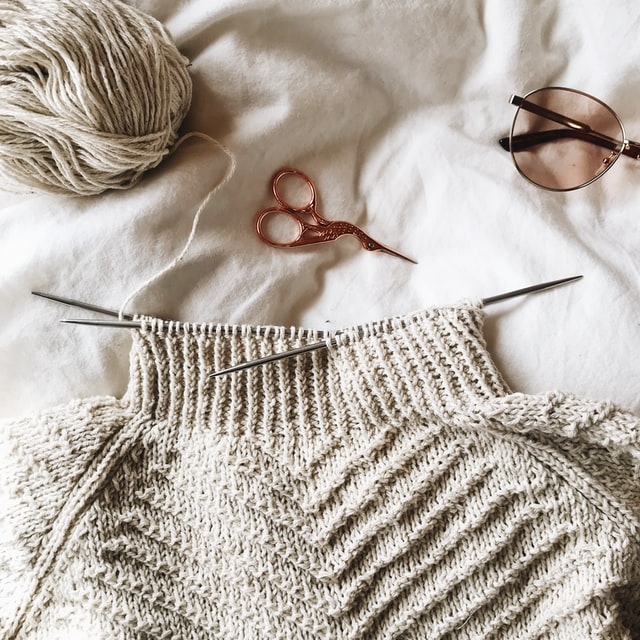
With our basic knitting techniques, you can quickly knit a garter stitch scarf, a dishcloth, a ribbed scarf, cardigans, or a baby blanket.


Explore more than 500+ high-income skills
Practice with experienced tutors
Book your first free lessonLrnkey AI Agent
Let’s personalize your support experience.
Are you a robot?