Why Good Communication Skills Are Important For Teachers
Discover why good communication skills are essential for teachers. Learn how coaching and training can help improve communication and conflict resolution.
Create learner account
Lrnkey
2022-02-08Explore more than 500+ high-income skills with highly motivated tutors
Discovering how to make resin jewelry is relatively straightforward. With a bit of patience and a great deal of practice, you can create beautiful pieces of your own resin jewelry.
As you explore how to make resin jewelry, you’ll learn about the different types of resin that can be used. And you’ll discover the tools needed to produce the jewelry. Working with resin is a process, and it is crucial to understand how to prepare, mould, and finish it. But with the correct equipment and materials, you’ll have no problem creating resin jewelry masterpieces.
You’ll discover that the pieces are made of a chemical compound composed of resin and hardener. Even though they both are liquids, they solidify when mixed. The dried resin is shiny and non-toxic.
Tips on How to Make Resin JewelryWith tons of information on the web, you might get overwhelmed by the different options available on the market. With our helpful guide on how to make resin jewelry, you can learn to choose the best resin for your ornaments and all the little tips and tricks to create beautiful pieces of resin jewelry.
Choosing the Best Resin for Your Jewelry There are a few options available in the market for casting resin. While learning how to make resin jewelry, you can work with epoxy, polyester, or UV resin. No one type is better than the other. Your choice will primarily depend upon what project you want to work toward.
There are a few options available in the market for casting resin. While learning how to make resin jewelry, you can work with epoxy, polyester, or UV resin. No one type is better than the other. Your choice will primarily depend upon what project you want to work toward.
An epoxy resin needs to be mixed with a hardener appropriately to achieve the desired results. You’ll find all the ratio instructions on the packet of resin. Your resin jewelry will not harden up properly if you mess up with the proportion. Most people prefer using a measuring cup and a scale to get the proportions right.
Epoxy resin leaves a beautiful, crystal-clear surface after it hardens up. This makes it perfect for creating jewelry pieces like earrings, rings, or pendants. One of the most affordable epoxy resins is ProMarine Supplies ProArt Epoxy Resin. It has an easy 1:1 mixing ratio and is highly durable.
Polyester resin is very similar to epoxy resin. It should also be mixed with an appropriate hardener in the right proportions to achieve your desired results. This type of resin dries out quickly and is extremely strong. Since it does not leave behind a transparent surface, it is not considered a good option for jewelry items. It is usually used to make profile plates.
Using UV resin is much easier than epoxy or polyester resin. You do not have to add any hardener to the mix. It is a good option for jewelry makers who do not want to wait for days for their molds to cure perfectly. You will need a UV lamp to cure your resin moulds.
The only issue with UV resin is you can only cast thin layers. It is not an optimal solution for large pendants or jewelry pieces. However, small earrings would be perfect for trying out UV resin. One of the best UV resins available is LIMINO Crystal clear UV resin. This high-quality resin comprises non-toxic materials and cures with a clear, glossy finish.
You can use either epoxy or UV resin for your first resin jewelry project. However, in this guide on how to make resin jewelry, we have selected epoxy resin. Epoxy resin is a little more versatile and gives you the freedom to create anything from tiny earrings to a large wall clock.
Find a tutor for this topic
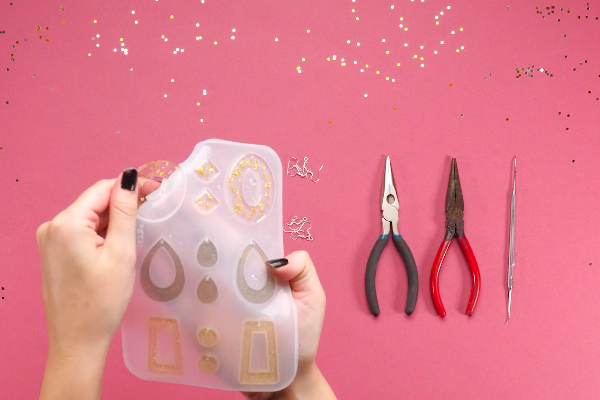
It is always best to gather all your supplies and prepare your workstation before learning how to make resin jewelry. Besides epoxy resin, you would require jewelry moulds, elements, mixing cups, a heat gun, craft sticks, sandpaper, toothpicks, gloves, safety glasses, plastic drop cloth, and a respirator mask.
While the epoxy resin is non-toxic after curing, the same is not true for a liquid resin. Liquid resins let out toxic fumes, which can deteriorate your health in the long run. Using a respirator mask, safety glasses, and gloves is necessary while exploring how to make resin jewelry.
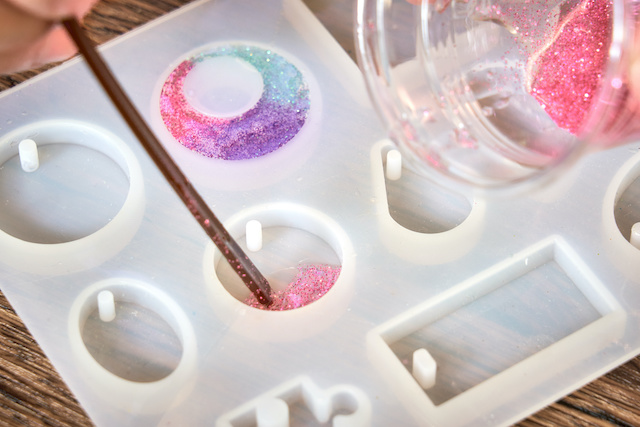
Once you have decided which jewelry piece you want to make as your first project, it’s time to get creative and prepare. You can add almost anything to your resin jewelry, from real flowers to powdered glitter.
If you add a porous element to your resin jewelry like scrapbook paper or fabric, you first need to coat it with a clear sealant. This will prevent air bubbles and discolouration of your detail elements. Once you have added the sealant, trim your pieces to the appropriate size to fit the mould.
Once you have decided which mould you want to use while learning how to make resin jewelry, you need to spray it with a mould release product. While some silicone moulds would not need a release product, you should use it while using a plastic mould. Let the mould release dry before you pour in your resin.
For the next part of our how to make resin jewelry guide, you will need to wear all your protective gear, including a respirator mask, gloves, and safety glasses.
Once you have prepared your resin mix, it is now time to pour it into the mould you’ve prepared.
Once your resin has cured completely, you should be able to pop them out from the mould using your fingers. If you live in a warmer climate and your resin pieces are too soft to remove, you can keep them in the freezer for 10 minutes. This makes it easier for you to pop them out.
You can now see how your resin jewelry has turned out. If you have any sharp edges on the resin, you can use fine-grade sandpaper to smooth out the edges. You can also use a polishing paste and a soft cloth to give your jewelry pieces a clear and smooth surface. Alternatively, you can use glossy lacquers to give some shine to your resin jewelry.
Making resin jewelry is quite a satisfying process, which you can easily change into a flourishing business with proper training. You can search for professional courses on how to make resin jewelry and learn some advanced tricks to boost your skill.
With a 1:1 lesson with an online coach, you can get familiar with their tactics and get inspiration from their work. When you join a professional course, you also get to be a part of the community and learn from their experiences.
Lrnkey, an online tutoring platform, offers online tutorials for beginners and advanced jewelry makers. These one-on-one lessons hosted by expert tutors will help you learn everything there is to make polymer clay jewelry.
Making resin jewelry is an exciting hobby, which will allow you to explore your creative side. We hope that, through this guide, you’ll have the knowledge to select the best resin and equipment for your needs. And we believe that our step-by-step instructions will help you successfully create your first resin jewelry pieces.


Explore more than 500+ high-income skills
Practice with experienced tutors
Book your first free lessonAre you a robot?