5 Reasons Field Technicians Must Continuously Upgrade Their Skills
Discover why investing in continuous learning for field technicians is essential for business growth. Learn how e-learning platforms can help your service business stay competitive.
Create learner account
Lrnkey
2022-02-08Explore more than 500+ high-income skills with highly motivated tutors
Are you looking for the best paper mache projects for beginners? If so, you’ve come to the right place. Paper mache has been used since 200 BC to create intriguing and practical items. Today, most people use this technique to make decorative pieces. It also acts as a great bonding activity for your family and friends.
There are different projects you can take up with this antique technique. Some of the best paper mache projects for beginners are making a mask or making paper mache eggs. You can also make a vase or a bowl out of paper mache. This technique is very creative yet valuable to try out on your own or with friends.
The concept of paper mache has been around for longer than the creation of paper itself. Chinese soldiers used to use lacquer to toughen their helmets. The craft may seem overwhelming initially but can be learned quickly by using household items.
In the article “Best paper mache projects for beginners,” we’ll discuss the history of this technique and how to choose your supplies. We’ll also discuss the first projects you can take up while learning this technique. So, let’s dive in.
Paper mache translates to chewed paper in French. This technique involves a paper and a paste an artist will use to make decorative items from scratch. The best thing about this technique is making the paper mache paste from everyday household items. This saves you the dreaded trip to the craft store.
The paper mache technique is believed to have originated in China. Soldiers used them to strengthen their helmets. A close relative of this technique can also be found in ancient Egyptian culture. People used to craft coffins and death masks with paper mache.
Today, paper mache is a crafting method used by artists to create unique pieces. You can use paper mache to create pinatas or even jewelry. While learning about the best paper mache projects for beginners, we’ll discuss multiple exciting projects that you can start.
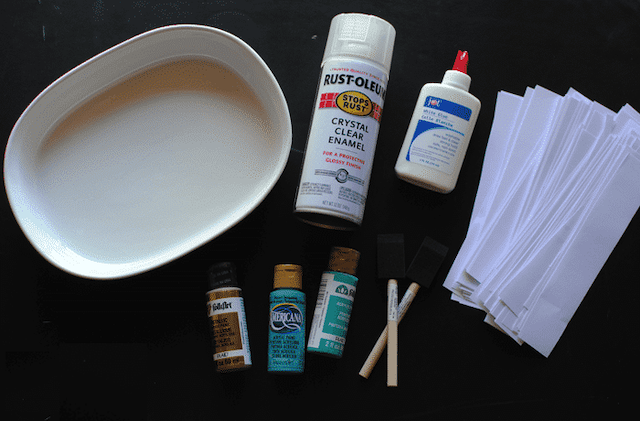
The best part about paper mache is the ease of craft. In this section of best paper mache projects for beginners, we’ll discuss the supplies you’ll need for your projects.
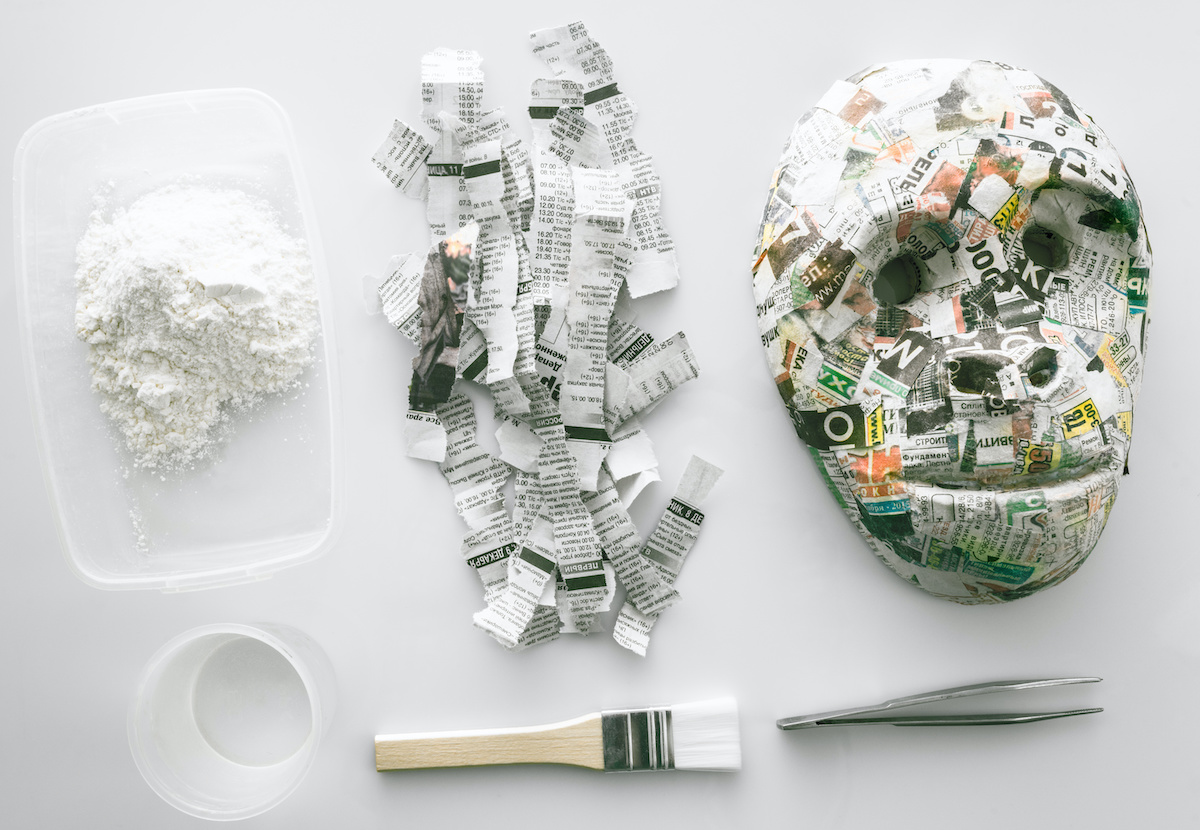
As the name suggests, paper is one of the most basic materials to have while gathering supplies for this technique. You can use blank paper sheets to create your project. However, we suggest you upcycle paper and use old newspapers or magazines for your paper mache project. This is a great way to be more environmentally friendly and save money.
The type of paper you should use will depend upon the project you choose. One can easily do the best paper mache projects for beginners with strips of old newspapers or magazines.
Another common yet important material for paper mache is water. It is a significant ingredient for your paste. Your paste would not be moist or of the right texture without water. You can use plain tap water for creating your paper mache projects.
Depending on the technique you use to make the paste, you will need glue or flour as another vital ingredient. The flour or glue will mix with water to create a paste-like consistency. This will be responsible for sticking and strengthening your paper strips.
Salt acts as an antifungal element in your paper mache paste. While some artists consider it a necessary component, others don’t think salt prevents mould. We would suggest adding salt to your paste. You should also ensure your projects are in a dry environment to prevent the onset of mould.
These two utensils are essential for making your paste. You will need a container to mix all your dry ingredients and mix them with a whisk. While choosing a container, make sure it is big enough to add and coat all paper strips. The whisk helps you break away any dry clumps, giving you a smooth paper mache mix.
Making a paste is the first step towards making a paper mache project. There are different techniques you can use to make this paste. All of them will end up with the same result. You can choose the method depending upon the ingredients available in your house.
In this section of best paper mache projects for beginners, we’ll discuss different techniques of paste-making.
Making paper mache paste on the stove is one of the easiest ways. The heat from a stove helps the mixture bind up quickly and provides it with the right texture. In this section of the best paper mache projects for beginners, we will learn how to make a paste on the stove.
Apply this paste with the help of a brush for a smoother application. You do not need to reheat the paste unless it is too thick to use. Easily store the paper mache paste in the refrigerator in a glass jar.
Use this technique while learning the best paper mache projects for beginners if you’re not in a hurry. The paste might take some time but provides a smoother application.
Find a tutor for this topic
 If you do not have a stove, you can also use the plastic bag shaking method. This method helps you mix the ingredients properly. In this section of the best paper mache projects for beginners, we’ll learn to make a paste by shaking.
Another easy way to make paper mache paste is with white glue and water. You do not need a stove or vigorous shaking to make paper mache paste this way. In this section of the best paper mache projects for beginners, we’ll learn to make a paste with white glue.
The white glue paste is a little thinner compared to flour paste. Because of this, you might need to add more paper mache layers to your project to ensure sturdiness. It is a quick, no-hassle way of making paper mache paste. You can use this technique while learning the best paper mache projects for beginners if you have glue on hand. For those managing multiple craft projects efficiently, exploring the Best Project Management Software can help keep track of materials, timelines, and progress.
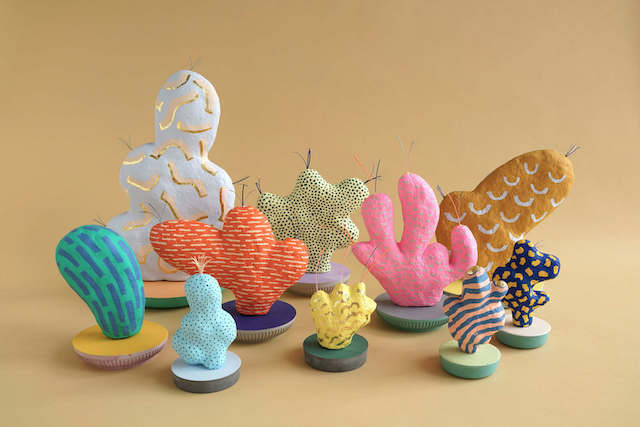
Paper mache can be used to make just about any decorative or functional piece you want to create. You can mould the mixture any way you like. In this section of best paper mache projects for beginners, we’ll discuss some first projects you can try.
Simple and fun paper mache masks can be a fun project for you and your friends to make. You can make this for Halloween or a costume party. All you need is a balloon, paper strips, paper mache paste, scissors, and paints.
In this section of best paper mache projects for beginners, you’ll learn how to make a paper mache mask.
The paper mache mask is now ready and can be worn by children or adults. It is one of the best paper mache projects for beginners, which you should learn.
The paper mache technique can make various sculptures, including bowls for fruits and vegetables. Make sure the surface is smooth and easy to paint, allowing you to add patterns of your choice. All you need is a bowl, paper strips, paper mache paste, cling wrap, scissors, and paints.
In this section of best paper mache projects for beginners, you’ll learn how to make a fruit bowl.
The paper mache bowl is now ready for your fruits and vegetables. And it makes for another one of the best paper mache projects for beginners.
The paper mache technique can make unique and interesting decorative pieces like birds. All you need is a detergent bottle, newspaper, paper mache paste, coloured feathers, googly eyes, glue, and paints.
In this section of best paper mache projects for beginners, you’ll learn how to make a bird.
The paper mache bird is now ready to be displayed on your table. It is one of the best paper mache projects for beginners, which you should learn.
Once you have decided to opt for paper mache as an art form, there are a few things you should be aware of. This section of best paper mache projects for beginners will discuss a few tips for budding artists.
Paper mache is a creative art form that will teach you new things the more you learn about it. This art has been around for thousands of years and has evolved. While learning about the best paper mache projects for beginners, reading about its history and future is essential.
If you want to learn more about paper mache techniques, you can take a 1:1 lesson from an online tutor. The tutor will help you be clear with the basic techniques and the small tips and tricks.
Lrnkey, an online tutoring platform, offers online tutorials for beginners and advanced artists. These one-on-one lessons hosted by expert tutors help you learn everything there is about paper mache.
Now go on and try to implement what you learned with our best paper mache projects for beginners guide.
There are a lot of factors to consider when it comes to painting a paper mache model. First, you need to decide what type of paint you want to use. There are acrylic paints, tempera paints, and oil paints. Each type of paint has its own advantages and disadvantages.
Tempera paints are the best choice for beginners because they are easy to use and come in various colours. Acrylic paints are also easy to use, but they can be more expensive than tempera paints. Oil paints are the most expensive, but they give your model the most realistic look.
Once you’ve decided on the type of paint you want to use, you need to choose the right colour.
You can dry paper mache quickly by using a hairdryer on the "cool" setting. The heat from the hairdryer will help to evaporate the water faster. And it will help to prevent the paper mache from becoming too stiff. Be sure to move the hairdryer back and forth across the surface of the paper mache. And be careful not to hold the hairdryer in one spot for too long.
Alternatively, you could place your paper mache model in a warm oven. Turn on the oven to its lowest setting and place the paper mache model inside. The heat will help the paper mache to dry quickly.
There are a few different types of flour that can be used for paper mache paste, but the most common type is wheat flour. You could also try using cornstarch or rice flour, but wheat flour is typically the best option because it has a higher starch content than other types of flour.
Either type of flour will work well, but we recommend using wheat flour if you’re new to making paper mache paste. It’s a little more forgiving if you make a mistake with the proportions.
You need to consider several things when choosing the best glue for paper mache. These include the type of glue, its adhesive quality, and the drying time.
The best glue for paper mache is white glue or wood glue. These have a strong adhesive quality and dry relatively quickly. If you’re looking for a waterproof seal, you can use Mod Podge or another sealant on top of your finished project.
One way to preserve a paper mache project is to coat it with a sealant, such as Mod Podge. Another option is to spray the model with a clear acrylic sealant. Or you can paint the paper mache model with a clear varnish. This will help protect it from dust, dirt, moisture, and the elements.


Explore more than 500+ high-income skills
Practice with experienced tutors
Book your first free lessonAre you a robot?