Learning how to make a scrapbook involves many steps that can appear complex to beginners. However, it’s not as complicated as you’d think. With enough practice, scrapbooking can become an exciting DIY activity.
Your scrapbooking project should begin with a theme or the story you wish to tell. Once you’ve thought of one of these, you can purchase a binder or a scrapbook album. You will also need a few materials and supplies to build your scrapbook. To assemble a scrapbook page, design a layout, trim and adhere your photos, and add embellishments.
You can also leverage AI tools to generate creative content ideas for your scrapbook and use humanizing AI tools to personalize your project, making it more authentic and heartfelt.
Note: If you would like to share your passion for Arts and Crafts online, follow this link and get your FREE online teaching website from Lrnkey.
With our comprehensive guide, you’ll learn how to make a scrapbook-like an expert. Let’s get started.
What You Need to Make a Scrapbook
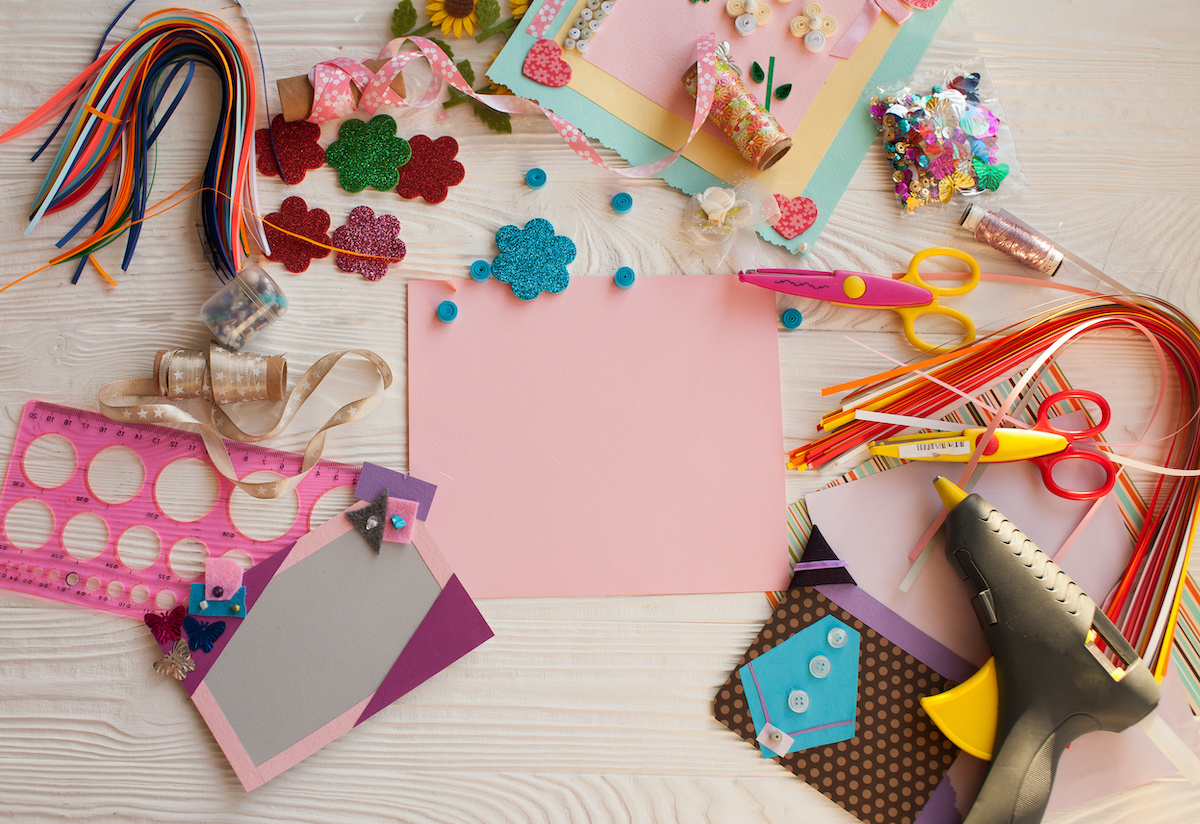
To begin learning how to make a scrapbook, you’ll need a few materials and supplies. It’s no secret that scrapbooking involves lots of tools and embellishments. When striving for success with your scrapbook project, don’t forget to explore creative ways on YouTube. You can even start your YouTube channel and showcase your work to your audience. And in the start, you can consider strategies like buy YouTube subscribers to share your process with a wider audience.
You can decorate with anything from stickers to washi tape. In addition, you’ll need a few items on hand to ensure a clean-looking scrapbook.
According to Amra Beganovich, top lifestyle influencer and founder of Amra and Elma and Colorful Socks, there are numerous ways to find scrapbooking items. The best place to find scrapbooking materials and supplies is a craft store. However, your local grocery store may also stock some scrapbooking items. Here are some basic supplies you’ll need:
- A scrapbook album or a binder
- Scrapbook pages
- Printed photos
- Pens, markers, or highlighters for journaling and doodling
- Scissors and trimmers
- Adhesives like double-sided tape or liquid glue
Ensure you use acid-free adhesives for your scrapbook. This will keep your scrapbook preserved for years.
If you want to spruce up your scrapbook, there are many additions to purchase. Consider these add-ons:
- Scrapbook or patterned paper to make pages more lively
- Embellishments like stickers, washi tape, jewels, chipboards, and ephemera frames
- Cardstock/solid colored papers for decorating
- Page protectors to guard your precious memories
- Storage boxes and paper folio organizers
- A craft knife
- A screw punch
Making a scrapbook is also an excellent opportunity for upcycling and decluttering. By incorporating items that would otherwise be discarded, such as old letters or fabric scraps, you’re not only creating a unique piece but also contributing to a cleaner environment.
You can also get scrapbooking kits for any of these materials and supplies. There are embellishment kits and page kits that contain complementary elements.
They are also often cheaper than getting each supply separately. Therefore, opt for a kit if you can’t decide which supplies to get.
Note: Click here if you want to teach Arts and Crafts on Lrnkey. Get your free online teaching website and start in 30 minutes.
Creative Scrapbook Theme Ideas for Beginners
![Scrapbook Theme Ideas]()
In this section of our guide on how to make a scrapbook, we’ll help ignite your creativity. Although family history is a common subject of scrapbooks, there are several other themes to choose from.
You’ll discover several ideas as you learn how to make a scrapbook. You can highlight graduation day, a school year, a vacation abroad, a valentine’s day or a wedding. The choices are endless!
Here are some other scrapbook theme ideas to highlight life’s little moments:
- Friendship memories – highlight the best memories you’ve had with your friends by putting together a ‘remember when’ scrapbook. You can include your favourite memory and even the story of how you met.
- Newborn baby memories – compile photos and other mementoes of a newborn to create a scrapbook.
- Kids’ memorabilia – gather stamps, buttons, or stickers to stick in a scrapbook highlighting a child’s little treasures.
- Year review – recap a year by including all the highlights and memories with friends and family.
- Dream vacations – let your imagination run with this theme idea and dream of all the places you wish to visit someday.
How to Make a Scrapbook: a Step-by-step Guide
Now, let’s learn how to make a scrapbook. We’ll cover all the basics, from choosing a theme to protecting your scrapbook pages.
By the end of this guide, you may discover that it’s easy to know how to make a scrapbook. However, if you don’t know what to do next, consider an online lesson on Lrnkey. An online coach can walk you through whatever scrapbooking problem you’re facing.
Step 1: Choose a Theme
The theme is one of the most critical aspects of your scrapbook. It’s your scrapbook’s north star. Your theme also sets the palette for your pages and guides you when you’re decorating and journaling.
Therefore, it’s the first thing you should choose when learning how to make a scrapbook. From there, you can organize your photos, keepsakes, and stories around the theme.
It’s best to select a theme before buying a scrapbook album or supplies. That way, you’ll know what materials you require and the album to use.
You also have the option of making a scrapbook without a theme. In this case, each page will still have a specific theme, but collectively you’ll have a varied scrapbook.
Step 2: Identify the Stories to Tell
Ideally, you want your scrapbook to capture the memories related to the theme and tell a story. Therefore, once you’ve selected a theme, make a list of the stories you want to tell in your scrapbook.
Think about key moments during an event or life occasion. Write keywords and brief descriptions to start. For example, if you’re making a wedding scrapbook, you can create sections for each point. You can highlight your engagement, cake tasting, honeymoon, etc.
If you opted for no specific theme in step 1, then you’ll only have to focus on the story for a specific page. You can also note down moments and memories you want to create scrapbook pages for in the future.
Once you have all your stories listed, decide how you want to organize them. You can tell the stories in chronological order, milestones, or sub-topic.
Step 3: Sort Your Photos and Memorabilia
With a theme and a story to tell, it’s time to organize your photos and memorabilia. While it can be tempting to use all your photos, it’s best to use a few favourites related to your theme.
When learning how to make a scrapbook, there are a few things to consider regarding choosing photos. To start with, it’s best to use those with the best lighting and focus. For those interested in exploring digital options, Mixbook offers an intuitive platform that makes it easy to create a free online scrapbook. The service provides a variety of customizable templates, AI-powered design tools, and access to free stickers, fonts, and backgrounds—so you can bring your memories to life without needing graphic design experience. Whether you’re looking for modern layouts or classic styles, the creative flexibility allows both beginners and seasoned scrapbookers to preserve their stories online.
You can also use photos that don’t include people or smiling faces. For example, if you’re making a wedding scrapbook as a wedding anniversary gift, you can use pictures of the cake and the décor.
If you don’t have physical copies of your photos, make sure you print them with a matte finish rather than glossy. A glossy finish is prone to fingerprint smudges. The last thing you want is for your scrapbook’s aesthetic to be ruined.
Select aesthetic photos that accurately portray the story you’re conveying for a non-theme scrapbook. You can always take photos to add to your scrapbook if you don’t have any relevant ones.
Once you have your photos, group them based on the stories you’re telling. Store them in labelled envelopes or folders for easy retrieval when you start scrapbooking. You can also include any relevant memorabilia in the envelope or folder.
Step 4: Gather Materials and Supplies
This is one of the most exciting steps, but it can also be overwhelming. With several scrapbook materials and embellishments in the market, it’s difficult for most beginners to decide which to buy.
As we mentioned earlier in this article on how to make a scrapbook, a kit can be a worthwhile resource. Kits contain cohesive materials and decorations. This means you won’t have to worry too much about your scrapbook looking like a hot mess.
If you’d rather not purchase a kit, ensure you buy your paper and embellishments from the same line and colour families. Your favourite craft store should have all the supplies you need for scrapbooking.
Remember to buy cardstock that’s acid-free, lignin-free, and buffered. This will ensure your scrapbook doesn’t significantly deteriorate over time. Also, opt for pigment-based ink pads and pens. An ink that’s waterproof and fade-resistant is also best.
Choosing an Album
![Choosing an Album]()
As you learn how to make a scrapbook, it’s essential to choose the correct album from the start. There are several sizes in the market. Deciding which to buy depends on your preference and your intended scrapbook theme.
The most common scrapbook sizes are 12-inch-by-12-inch and 8.5-inch-by-11-inch. A 12”x12” album allows you to decorate a page with several photos and embellishments. However, storing an album of this size can be a hassle.
An 8.5”x11" album is best for scrapbookers who want something that reduces the pressure to fill up pages. Each page accommodates one to two pictures. If you chose a pet, vacation, or school year theme, this is the best album to get.
There are also mini albums available that come in sizes of 8”x8”, 6”x6”, and 5”x7”. If you’re making a scrapbook gift for someone, one of these sizes will work. They’re also great for beginners.
Another aspect of your album to pay attention to is the type of binding used. The binding is critical since it determines whether you can move, add, and remove pages.
The bindings you’ll come across include 3-ring or D-rings, post-bound, and strap hinges. Which you settle on depends on the flexibility you want your scrapbook album to have.
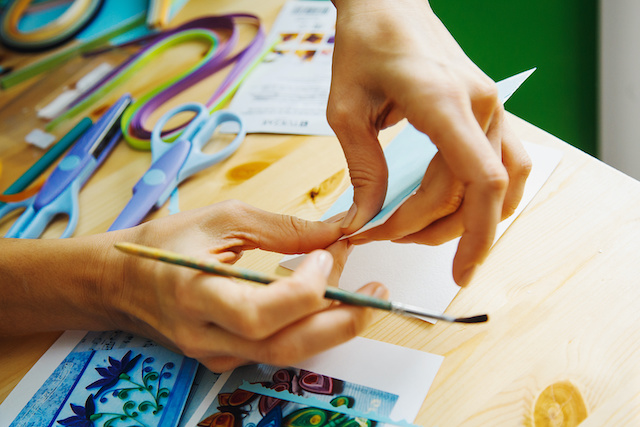
Step 5: Create Scrapbook Pages
Now that you’ve gathered all the necessary elements, it’s time to make your first page. This section of our guide on how to make a scrapbook guide will require tapping into your creativity. Remember to have fun along the way and don’t aim for perfection.
Design a Layout
Creating a scrapbook page layout is a fantastic first step for beginners with a specific theme in mind. Start here before cropping and pasting photos and elements.
The great thing about a layout is that you can repeat it throughout your scrapbook. This will save you time and ensure you utilize your materials well. You can also achieve a cohesive and clean look with a layout.
Consider how many photos you’ll be using on a page. Afterwards, experiment by positioning memorabilia, page titles, and embellishments around the photos.
Once you create a layout you’re pleased with, take a picture to use as a reference. Also, note relevant element dimensions, such as photo sizes. Remember, you can create more than one layout and interchange them as you go.
If you’re starting a non-theme scrapbook, try out different placements of the elements. Ensure that they create a visually appealing look before pasting them on the page.
Note: If you would like to share your passion for Arts and Crafts online, follow this link and get your FREE online teaching website from Lrnkey.
Tips for Designing a Layout
- Designing layouts will become easier as you learn how to make a scrapbook. However, in the beginning, we recommend using these tricks:
- Find layout inspiration on Pinterest, online, or in a magazine. Simply copy the designs and customize them to your style and photos.
- Trim photos down if they’re too big or if you have many options. You can also reprint your photos in smaller sizes.
- Have a focal point photo on the page. Choose the strongest of your images that will draw a viewers’ attention and stand out from the others. Then arrange your layout around this photo.
- Use three colours on a page: a main, secondary, and accent colour.
- Draw a 3 by 3 grid on your page. Where the lines intersect, place your photos.
- Less is more with embellishments. Your page can come to life with two embellishments as opposed to 10.
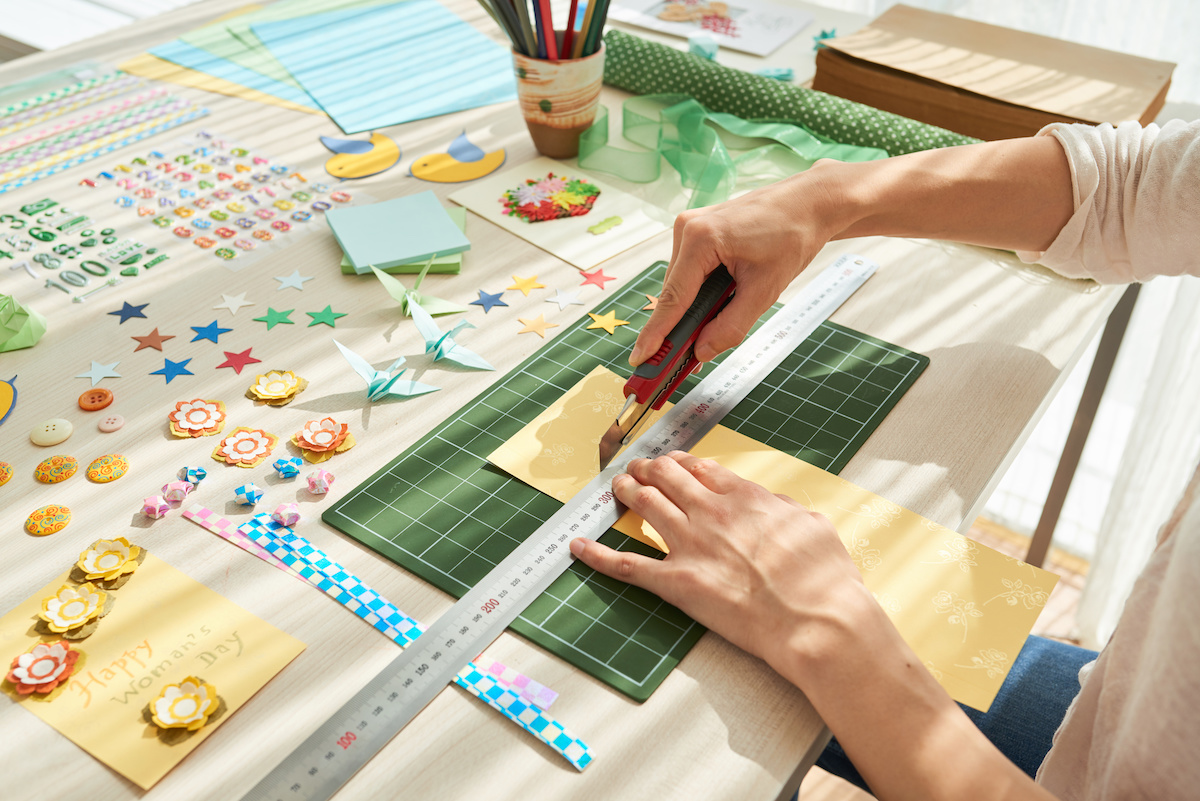
Trim, Mat, and Paste Photos
Now that you have a layout in mind, you can build your page. It’s essential to take your time when learning how to make a scrapbook page that stands out.
Trim photos with care by making pencil markings on the back first. Remember, if you don’t want to cut your photos, resize them and print them out instead. You could also opt to mat the images instead of cropping them.
Matting your photos comes down to your preference. Use this method if you want your images to stand out more or draw attention to the focal point photo. It involves pasting your photos on cardstock, fabric, patterned paper, or another material to create a border.
To choose a background for your photos, match it with a colour in the image for a coordinated look. You can do this with both solid-coloured and patterned paper. Once you have your photos sorted, adhere them to the page with acid-free glue.
Creative Scrapbook Photo Ideas
- Tilt photos for an off-kilter look.
- Use black and white photos for contrast.
- Trim photos into different shapes like circles or hexagons using Watermarkly.
- Lend a vintage look to your scrapbook by only using Polaroid-style shots.
- Use the physical maps you used during your travels as a background.
Create a Page Title
A title is vital for your scrapbook pages. It will convey the story you intend to tell.
Write a brief yet descriptive heading for your page to support the theme or topic. You can use different pens and make creative doodles around the letters to make the heading more attractive.
Another idea is writing the title on cardstock instead of on the page. You can also use a stencil, stamp, or stickers to write out the heading.
If you don’t want a handwritten page title, create one on a computer, then print it out. Use different fonts and designs to achieve the same visually appealing look, like a handwritten title.
Add Text
Instead of having a scrapbook page that’s only filled with photos, try adding text. Captioning your photos and writing journal entries is a great way to recall what was happening in a highlighted moment. After all, photos can lose their meaning over time.
Take your time to think up descriptive and thoughtful text. The captions you include could be dates, names, brief descriptions, and locations.
As for the journal entries, you don’t need to write paragraph after paragraph of your thoughts and feelings. You can write lyrics, quotes, heartfelt letters, poems, lists, or anecdotes. The list of stories you wrote in step 2 of this guide on how to make a scrapbook can always help.
Write caption and journal drafts on a separate piece of paper before adding them to a scrapbook page. This way, you can refine your writing and clear any typos.
Much like the title, if you don’t want handwritten captions and journal entries, type them on a computer.
Decorate With Memorabilia and Embellishments
![Decorate With Memorabilia]()
Customize your scrapbook page as much as you want. Your drab pages can have more sparkle, depth, and substance with embellishments.
The options of scrapbooking embellishments are endless. You can use ribbons, stamps, pressed flowers, watercolor drawings, and even paint chips from your local hardware store.
Envelopes are also a great addition to any scrapbook. You can use patterned paper to create them or get creative with standard envelopes. Use them to save tickets, receipts, or other small trinkets related to your theme.
Remember to use embellishments sparingly. It can be tempting to use everything, but it’s not always necessary.
Protect Your Pages
Once you’ve made all of your pages, place them in a protector. This will ensure your pages aren’t damaged, torn, or smudged with dirt. You can choose between top-loading or side-loading protectors and a non-glare or clear finish.
Step 6: Assemble Scrapbook Pages
The last step is adding your protected pages to your scrapbook album. You can keep adding the pages without arranging them. Then once you’ve completed all the pages, sort them to fit the storyline you thought up.
You’re only a few tries away from becoming a pro now that you know how to make a scrapbook.
Conclusion
Scrapbooking is one DIY project that’s easy to learn. Remember to pay close attention to the theme, storyline, photos, and embellishments. Once you’ve done so, you’ll have a magnificent collection of memories to look back on for years.
If you want to learn more about how to make a scrapbook, you can take a 1:1 lesson from an online tutor. This will help you better understand the ins and outs of this craft.
Lrnkey, an online tutoring platform, offers online tutorials for beginners and advanced artists. These one-on-one lessons hosted by expert tutors help you learn everything there is about making a scrapbook.
FAQs
What’s the best way to bind a scrapbook?
Scrapbook pages and layouts are typically housed in page protectors, which you can easily slot into a binder. This also simplifies things if you decide to change the order of the pages. The average scrapbook album includes approximately 10 page protectors, which will give you 20 pages front and back.
There are many ways to bind a scrapbook, but the most popular methods are using a ring binder or spiral binding. The size of the scrapbook can also affect the binding method. For example, a smaller book might be better suited for spiral binding. In comparison, a more extensive book might be better suited for a ring binder.
Ultimately, it’s up to personal preference which binding method you choose.
How do I lay out the pages in my scrapbook?
There are several ways to layout the pages in your scrapbook. You can use a design template or create your own layout. If you’re using a design template, you can either follow the template exactly or change it to suit your taste. If you’re creating your own layout, there are different ways to approach it. One popular way is to use a scrapbook sketch.
A scrapbook sketch is simply a drawing of the basic layout of a page. And you can use it as a guide to creating your own unique layouts. Many free sketches are available online, or you can buy one from a scrapbook vendor.
It’s also often helpful to look at other people’s layouts for inspiration. You could also make a digital Flip book to visualize what your scrapbook will look like.
What’s the ideal size for a scrapbook?
There isn’t one answer to this question since people’s scrapbooking needs vary drastically. It would largely depend on the intended purpose of the pages and your available budget. However, the two most popular formats for scrapbooking are 12”x12” and 8.5”x11″. So, if you’re unsure about what size to choose, those would be good places to start.
Opting for a square format will be the most hassle-free approach. For instance, the 12”x12” layout provides more space to work with. That said, there are no hard-and-fast rules when it comes to scrapbooking, so feel free to experiment until you find a format that works best for you.
Can I include newspaper clippings in my scrapbook?
Yes, you can include newspaper clippings in your scrapbook. However, it’s important to note that newspaper is acidic. And over time, this acid can cause your photos and other materials in your scrapbook to degrade.
For this reason, it’s usually a good idea to photocopy any newspaper clippings before including them in your scrapbook. This will help protect your photos and other materials from the damaging effects of the acid in the newspaper.
How do I make sure the photos in my scrapbook don’t get damaged?
The best way to protect your photos is to steer clear of acidic and metal materials. And don’t include excessively lumpy embellishments that could rub against and wear down your photos. It’s also a good idea to ensure your cardstock is acid- and lignin-free.
Another piece of advice is to take extra care when handling your photos. The natural oils from your fingers can leave marks that will become unsightly over time. Therefore, always hold photos on their edges and try not to touch the image itself.
If you have duplicate photos, it’s a good idea to use those instead of the originals.