Are you looking to learn how to make a flipbook? Well, you are at the right article. When I was young, I always made small caricatures in the corner of my notebook. Today, we’ll learn how to convert that drawing into full-blown animation.
Flipbooks have been around for hundreds of years. It was one of the earliest forms of animation techniques. While learning how to make a flipbook, you need to gather all your supplies. Then you should think about a theme for your flipbook. Once you are ready, start drawing and painting your illustrations. Get your book bound, and your flipbook is ready.
In the article “How to make a flipbook,” we’ll discuss the traditional and the new digital techniques for making flipbooks. So, let’s dive in.
What is a Flipbook?
A flipbook is a booklet with a series of images. These images gradually change, making it look like the illustration is moving.
In simpler words, the book conveys a series of pictures in a progressive form of movement. When these pages are flipped in rapid succession, they create an illusion of movement. Hence, it is called a flipbook.
The concept of flipbooks has been around for over 150 years. Artist Pierre Hubert Desvignes is credited with creating the first version of the flipbook. Soon after that, an English-American photographer set up his camera to make a digital flipbook.
Flipbooks have been developing over the years, with different artists adding their twist to this old technique. In this article on how to make a flipbook, we’ll discuss other methods to make creative flipbooks.
Tips to Get Started With Your Flipbook
![Started With Your Flipbook]() Making a flipbook sounds complex. But if you properly execute your story and design, it can be done without any errors. In this section of our blog on how to make a flipbook, we’ll discuss a few tips you should be aware of.
Making a flipbook sounds complex. But if you properly execute your story and design, it can be done without any errors. In this section of our blog on how to make a flipbook, we’ll discuss a few tips you should be aware of.
Make Sure You are Drawing on the Right Side of the Book
While making a flipbook, there is a particular section of your flipbook which would not be visible. If you draw your illustrations in those sections, you’ll be wasting all your hard work. Before starting with your flipbook, make sure that you have figured out the space you’ll use to draw your caricatures.
You should also make sure that you leave a little space on the bottom right corner of the book. This will ensure that your thumb is not obstructing any part of the drawing.
Number Your Pages
It’s always a good idea to draw on single pages and then bind them together in a flipbook. While drawing your illustration, make sure that you number all your pages. It’s pretty frustrating to figure out the order of your illustrations later. Just number the backside pages while you are drawing.
Create Recurring Drawing Patterns Beforehand
If you have components in your illustration that are being repeated, then you should draw them first and keep them aside. This would help you save time while creating your flipbook. You don’t have to put in plenty of time meticulously drawing the frame or making it as neat as before.
Use a Pencil for Initial Drawings
Using a pencil and eraser is much easier while creating a flipbook. This way, you can erase your mistakes and keep drawing. When you use a pen, you have to draw the entire page again, even if you make a small error.
You can draw rough sketches of your illustration with a pencil and then outline them with a pen later. Once you get the hang of what you’re drawing, you’ll be able to sketch with a pen directly.
Prepare a Mini Storyboard
Keeping your thoughts organized is necessary while drawing your flipbook. A mini storyboard would help you find the ending to your story. Without a mini-board, there is a good chance that you’ll keep drawing without a purpose. In such a case, you’ll have to revisit your pages multiple times and make changes to your drawings.
You can create a good-sized and engaging story with around 50 to 150 frames. Anything above that will take you a lot of time and effort. Keeping your thoughts structured is the key to making a successful and exciting flipbook.
Find a tutor for this topic
How to Make a Flipbook
![Make a Flipbook]()
Drawing little animations at the corner of your notebook is always fun. Making a high-quality flipbook can be super fun to make. Here you’ll learn the essential elements of flip animation.
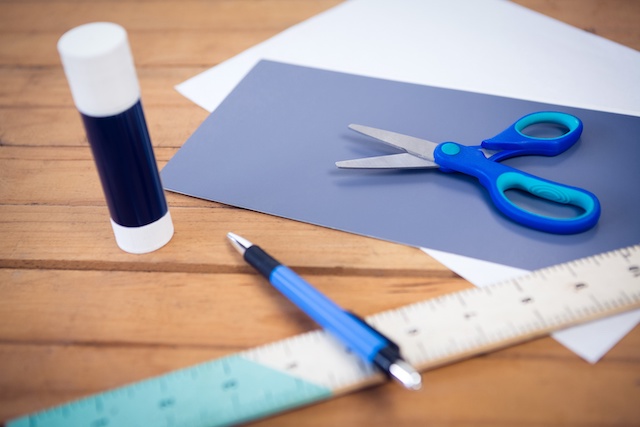
Gathering Your Supplies
Before starting with your flipbook, you should gather all the different materials needed for its execution. These materials will help you make your book faster in a single sitting.
- Blank index cards
- Glue
- Coloured Pens and Pencils
- Binder clips
- HB pencil
- Eraser
Understanding the Basic Concepts of Flipbook Animation
The key to creating an illusion is replicating a character repeatedly, with slight variations. This replication will help you capture a moving visual sequence. In this section of our blog on how to make a flipbook, we will take you through the basic concepts of animation. It will help you to create a flipbook without any edits.
Replicating a complex illustration, again and again, can be pretty challenging. For instance, it isn’t easy to replicate a looney tunes bunny in 50 frames. But, it is easier to make a ball with slight variations in movement.
For your first flipbook project, we’ll suggest you start with something small and manageable. You can begin with a falling ball animation. When done correctly, it looks like an image has come to life. Here you do not have to worry about replicating different images over and over again. Instead, you just have to replicate a single image.
Before starting your flipbook, we will highly suggest you draw a rough idea on a blank notebook paper sheet. Once you have figured out how you want your ball to drop and bounce, you can number these images.
This will give you a good idea of what you should draw on your index cards. Once you are familiar with the concept, you can play around with different angles and projections.
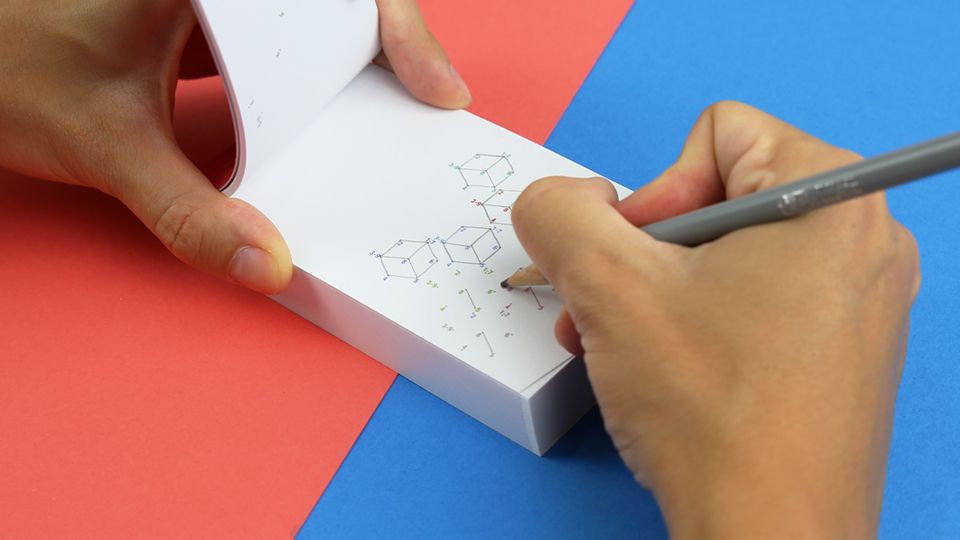
Illustrating the Book
Once you have understood the basic concepts of animation, you’re ready to create it. Below we’ll discuss the steps you should follow while drawing and numbering your index cards.
Make sure that you have your reference sheet made and your ideas thought out. This sheet will help you get the work done faster without much editing. While creating a flipbook, it’s all about developing a rhythm. The more you practice how to make a flipbook, the better you’ll get at it.
For your reference, we are drawing a ball drop in this section.
- Draw the initial position of your ball on the first index card. Make sure you number your card in the upper left-hand corner.
- Now trace the next slide on top of the previous slide, but shift it slightly.
- Use the frame you just made as the template for your next frame. This will help you ensure that you are following the pattern and not messing with the animation effect of the book.
- Keep repeating these steps until you have traced the entire motion of the ball.
Make sure you keep checking your accuracy by keeping 3 or 4 frames side by side. They should look identical with a slight difference in their position. You have learned the most challenging part of how to make a flipbook. All you have to do now is make some final edits and give the finishing touches to your illustration.
Finishing Up Your Book
Once you have illustrated your book, you have to make final edits to your flipbook. In this section, we’ll discuss how to give your book the finishing touches to make it look perfect.
You probably have used a pencil to draw your illustration if you are a beginner. Now you have to outline the pencil with a black ballpoint pen. This will make your illustrations look sharper and not smudge out over time.
Fill in some colour for your drawings if you like. It is more of a personal preference. I prefer keeping my flipbooks black and white, as colouring so many frames can take up a lot of time. But colouring your illustration does bring your book to life.
Binding Your Book
Once you have completed colouring and outlining your illustrations, it is time to bring all your index pages together. Below we’ll explore the different binding styles for your flipbook.
Binding helps make your flipbook look more professional. The better you’ll bind your book, the more perfect it will look. You should make sure to bind the pages together as tightly as possible. There are different methods for binding. The length of your flipbook would determine which procedure you should choose.
Using Binding Clips
The easiest and the most time-efficient method is to use two binder clips to hold your pages together. Binder clips make a tight connection and ensure that the pages don’t move out of their place. However, this method is suitable when your flipbook is around 50 pages long.
Using Glue
![Using Glue]()
Gluing your pages together is another great idea if your flipbook has more than 50 pages. This part of our guide on how to make a flipbook will look at binding your pages with glue.
- Cut off a card section, ensuring that it will overlap the top and bottom cards you want to bind.
- Fold the binding piece over the card. Run your glue stick over the edges of the paper and stick them together.
- Make sure that you are gluing the backside of the paper.
- Repeat this for all the index pages.
You’ll ensure that none of the pages comes out when flipping through your illustrations by gluing your flipbook. These connections add to the durability of the book.
Using Rubber Bands
This binding method is a little unique and different. Take a bunch of rubber bands and pull them over one of the edges of the index cards. This is a temporary binding method. Most pages fall out while flipping. Additionally, if your flipbook is a bit shorter, the index cards are easily bent by the stress of rubber bands.
You can use this to check the illustration of your book. It can then be bound more permanently.
Using Duct Tape
Using duct tape is one of the easiest methods to try out while learning how to make a flipbook. You need to hold your pages in place and start taping the edge together tightly with duct tape. This might sound easy but can be frustrating depending upon the size of the book.
If you have more than 100 frames, then there is a chance that one of the frames will shift its position. You can use a single binder clip to hold the cards in position and then use duct tape to bind them together tightly.
You should select your binding technique depending upon the size of your book. If you have less than 50 or 70 frames, we’ll suggest you use the binding clips. For more than 100 pages, you can stick your flipbook together with a glue stick.
Other Techniques of Making a Flipbook
Apart from drawing, there are different techniques you can use for making a flipbook. Here we will learn a few digital ways of creating your flipbook.
Making a Flipbook Using Video
Using a video editor, you can cut different frames of your video and convert it into a flipbook. In this section of making a flipbook, we’ll discuss the steps to creating a book via video.
- Choose a video you want to convert into a flipbook. The longer video you choose, the bigger your flipbook will be. A 15 to 30 second would be best for a beginner.
- Search for a video flipbook maker on the internet and select an app of your choice, like flip clips or myflipps.
- Upload your video to the online video maker.
- Customize your flipbook according to your choice. You can create an exciting cover for your book and choose the size. You can also decide the points in the video you want to begin and end your flipbook.
- Once you are happy with your flipbook and customizations, place an order for your book. You can either order in bulk or individually. If you are creating flipbooks to hand out at a wedding, ordering in bulk can save you money.
- Depending upon the customizations and the website you chose, your flipbook can take up to 4 weeks to get delivered.
Making a Digital Flipbook
With the advent of technology and social media, digital flipbooks have gained popularity over the years. While they don’t give you the exact feel of the animation, one can easily share them on social media websites. In this section of our blog on how to make a flipbook, we’ll discuss the steps to create a digital flipbook. There are different platforms like Paper Turner or Issue.
- Choose a platform you want to use for creating a digital flipbook. You can compare the platforms depending upon the amount of customization each offers.
- Start uploading the pictures you want to use for your flipbook. You can either drag and drop them or browse them on your computer.
- Once you have uploaded the pictures or the pdf files, click on Convert. Your flipbook maker will automatically convert all your images and pdfs into a flipbook in just a few minutes.
- After the platform changes your file into a flipbook, go through all the pages. Make sure they are following the theme you set them to. If you are using documents, make sure you check for any typos or grammatical errors.
- Customize your flipbook the way you want. If you use pictures, you can add filters to brighten the image. You can add pdf tools as well to spice up your document. Personalize your flipbook by adding images, audio clips, video clips, or links to your digital flipbook.
- Once you are happy with all the customizations, click on the publish option.
- Depending on the platform you are using, you will get a link or a download option. Most free platforms offer you a shareable link that you can upload on Twitter or Facebook. A free flipbook maker lets you download your book and view it offline. You can then publish them on your Instagram handle, Snapchat, Facebook, or Twitter.
Take a Class
Creating a flipbook is an imaginative and fun task, whether digital or by hand. This animation art has been around for hundreds of years and has evolved. While learning, you can try out both the drawing and the digital methods.
If you want to learn more about how to make a flipbook, you can take a 1:1 lesson from an online tutor. This will help you be clear with the basic techniques and the small tips and tricks.
Lrnkey, an online tutoring platform, offers online tutorials for beginners and advanced artists. These one-on-one lessons hosted by expert tutors help you learn everything there is about making a flipbook.
FAQs
How do I make a flipbook with photos?
To make a flipbook with photos, you’ll need:
- Photos of the same thing taken from slightly different angles
- Printer
- Scissors
- Glue or tape
- Construction paper in two different colors
- Print out the photos and cut them into small squares.
- Glue or tape the squares onto construction paper in two different colors so each photo is on a separate piece of paper. Make sure that all of the squares are facing the same way.
- Cut along the lines between the squares to create little book pages.
- Flip through your new flipbook and watch your photos come to life.
What is the best size for a flipbook?
There isn’t really a "best" size for a flipbook. It all depends on what you want to use it for. If you want to make a flipbook that will be used as an advertisement or for marketing purposes, then you’ll want to make sure that it’s large enough to be seen from a distance. But if you’re just using it for personal enjoyment, then any size will do.
What type of paper is ideal for use in a flipbook?
There isn’t one ideal paper type for use in a flipbook. It really depends on your preferences and what you’re hoping to achieve with your flipbook. Some people prefer to use thin paper to easily flip the pages. In contrast, others prefer thicker, more robust paper that can handle more wear and tear. You could also try experimenting with different types of paper until you find one that gives you the results you’re looking for.
How can I convert a PDF into a flipbook?
There are a few ways to do this. One way is to use an online converter like Flipbook PDF to convert your PDF to a flipbook format.
Another way is to use software like Adobe Acrobat or InDesign to create a flipbook. This software allows you to create interactive PDFs that can be flipped through just like an actual book.