6 Tools Every Writer Needs
Discover essential digital tools for writers that enhance creativity, streamline organization, and ensure polished, professional writing. Transform your writing process today!
Create learner account
Lrnkey
2022-02-08Explore more than 500+ high-income skills with highly motivated tutors
Learning how to make greeting cards at home can be daunting for beginners. However, you’ll discover that it’s easy to learn over time. Card making can come in handy when a special occasion arises, and it rarely requires many supplies.
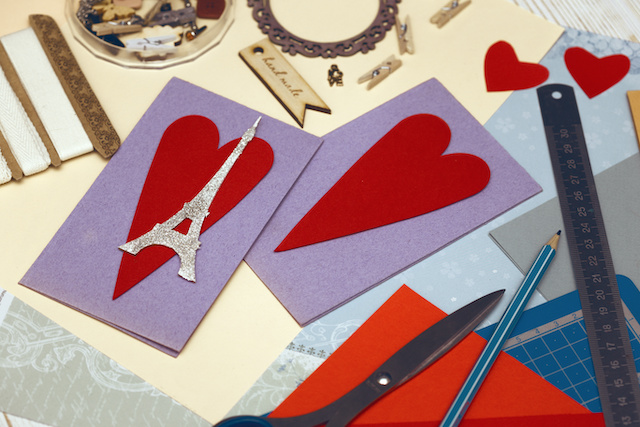
You’ll need essential supplies and materials from your local craft or stationery store to make a greeting card. You can make several designs, including a basic greeting card and a window greeting card. You can also create a greeting card on a computer then print it out. Decorate as much as you want, but don’t go overboard.
Why spend money on a card when you can make one at home that the receiver would love much more? With practice, anyone can make striking and meaningful greeting cards. Perhaps even good enough to rival store-bought greeting cards in quality.
This article will teach you how to make greeting cards in three styles. We’ll also give you some card-making tips to ensure a clean and professional look. Let’s dive right in!
Before we walk you through how to make greeting cards, you’ll need to get some supplies. If you have a craft room for DIY projects, you may already have the supplies you need for a greeting card.
Visit your local craft or stationery store if you need to buy some. Alternatively, make an order online from Amazon or another online retailer.
The supplies you need depend on the card design. These are some basic supplies to have when learning how to make greeting cards:
We recommend using cardstock with a weight of between 80-110 pounds for your base. Thicker card stock will allow you to create high-quality greeting cards. It works for both basic and elaborate designs.
Depending on your design and preference, you can get cardstock with a smooth finish or stock with more texture. Also, you can purchase it in any colour you want.
Coloured cardstock can also add accent layers of colour to a card. However, this is more of an advanced technique. For such designs, you’ll need a double-sided adhesive runner.
A Cricut Joy cutting and writing machine is an advanced tool you might want to invest in at a later stage. It works like a stencil to create clean lettering on cards. However, it’s not a must-have. You can create a unique greeting card with the basic supplies we’ve listed above.
When you begin learning how to make greeting cards, inspiration may not strike immediately. Therefore, you need to get your creative juices flowing.
Pinterest is an excellent resource for greeting card designs. If you’re still uninspired after exploring the designs, consider these ideas:
Now that you have some ideas let’s learn how to make greeting cards.
As you learn how to make greeting cards, you may notice different styles. This section of this article will show you how to make three greeting card designs. Namely, basic, window, and printed.
Handmade greeting cards are pretty popular, but there’s also the option of making them on a computer. There are several digital software on the market to make cards for any occasion, from a birthday to Christmas. This includes Canva, Adobe Photoshop, and Affinity Publisher, programs which can also be used to create digital brochures and other graphic designs.
When making greeting cards by hand, you’ll have to pay close attention to the size. The reason is you’ll need to ensure the card you create can fit in an envelope. This, of course, won’t be a concern if you’re making your own envelopes. These are the typical greeting card sizes:
Find a tutor for this topic
This is the most straightforward design for beginners to learn when looking into how to make greeting cards. It includes basic text and decorations. Also, you can create it in less than 30 minutes.
Required supplies:
This first step applies if you don’t have a pre-folded blank card. If you do, move on to step two.
Take your cardstock or thick paper and cut it into your preferred size. As mentioned previously in this guide on how to make greeting cards, the standard size is 5"x7".
Next, you’ll need to create a fold. Making a neat and professional fold on your card will require a scoring technique. The paper fibres are loosened when scoring before folding, allowing for a neater fold.
Grab your ruler and a blunt piece of metal like a butter knife. First, measure the centre point on the cardstock or thick paper.
Draw a line down the middle of the cardstock or thick paper crosswise using a pencil. Make sure not to press down too hard when drawing this line, as you’ll need to erase it.
Once you’ve drawn the line, leave your ruler where it is and grab the blunt piece of metal. Drag it down the line as you did with the pencil to create an indentation. Once that’s done, erase the line you drew.
Now, turn the cardstock or thick paper over and fold it. This technique is known as folding on the mountainside. It creates a better edge on your base than folding on the side you scored.
Scoring is also a great way to divide a big sheet into two. Simply draw a scoring line and divide the sheet into two small base cards.
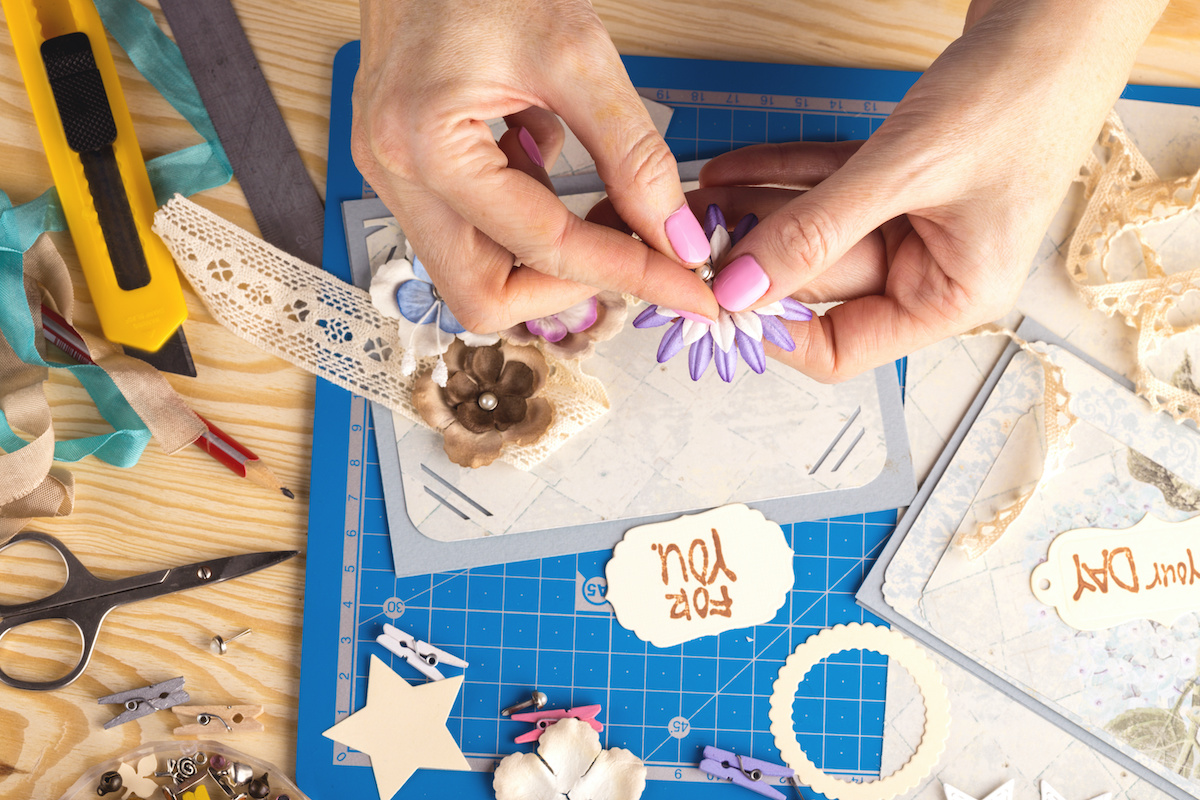
This is an exciting part of card making. You can have as much fun as you want and tap into your creativity to create something striking. For example, you can create a sketch out of watercolour over the top of the card. Or draw a field of flowers on the inside.
If you’re not up for drawing, you can use patterned paper and other materials to decorate.
Try to make a card for a general occasion that matches the theme of the greeting. For example, a card for a 50th anniversary can include elements of gold to signify the milestone. Alternatively, if you know the person receiving the card, personalize it to appeal to them.
Remember, you can always find decorations around your house, such as buttons, ribbon, and magazine pages. Scrapbooking embellishments also make incredible decorations for cards.
It’s best to go with less rather than more when decorating the card. Although a cluttered design will be appreciated as much as a simple look, it can draw focus away from the message. Be conscious of where you place elements and use the white space concept.
Pro tip: before gluing any elements on the card, position them first and see how it looks. Once you’re satisfied with the layout, take a picture, then glue the elements.
Most greeting cards have generalized messaging, like “Happy Birthday”. Therefore, you won’t have to worry too much about what message to write.
Add a personalized message to leave a more lasting impression on the recipient. This is typically a more detailed text wishing the person well.
Write the text on the card in whatever style you want. Don’t be afraid to get creative here with swirly text and unconventional lettering.
You can always skip this step if you’re making a greeting card for someone else.
Find or make an envelope that fits your card and tuck it inside.
This particular style creates a unique design that can be used for birthdays, anniversaries, and marriages. Although it requires more skill and supplies, it’s excellent for beginners to learn how to make greeting cards.
You’ll need these supplies:
It’s best to use double-sided paper or cardstock for this design. Avoid regular paper, as it won’t hold.
Follow the instructions mentioned earlier in this guide on how to make greeting cards for a basic base.
Once you’ve made or chosen your base, put it aside for now, then move on to the next step.
Grab another sheet of cardstock or thick paper. Crop it to a 4”x5” rectangle using a cutting mat.
To make an opening, follow these instructions:
Unfold the paper to reveal an X cut. Carefully erase the pencil marks you made, then smooth the folds to achieve a professional and neat look.
Pull the X flaps cut back until you have a rectangular window. Secure the flaps by gluing them down.
Bring the card from step 1 back to the centre of your workstation. Take the window base you created and paste it on the top of the base card.
Follow the decorating guidelines for a basic greeting card to spruce up the card. You can put a stamp, an image, or text inside the window.
Making a card on a computer is just as fun as doing it by hand. And it’s much faster to learn how to make greeting cards this way. You can create a traditional portrait-oriented card or opt for a landscape view instead. If you’re looking for inspiration or ready-made templates, there are several free ecard companies with JibJab that offer fun, animated, and customizable designs to get you started.
There’s no fault in decorating a printed greeting card. You can easily use any decorations for a handmade card on a printed one.
There are several software options to create printed greeting cards. This includes Canva, Adobe Photoshop, Adobe InDesign, Microsoft Word, and Pages.
Canva, Microsoft Word, and Pages are the most beginner-friendly of these options. Adobe products often have a learning curve. However, if you want to try out the software we mentioned, you can do so.
You can use pre-made designs using greeting card software like Canva and MS Word. Choose one that’s appropriate for the theme and style you’re going for.
The slide templates are fully customizable, so you can change the fonts, colours, and images. On Canva, you’ll have access to a whole image library, stickers, and other elements.
If you’re designing a card on a blank page, ensure that you do so on one sheet of paper. That way, when you print it out, you fold it in half.
If you’re using a template, add some graphics that apply to the theme. The great thing about designing a greeting card on a computer is that you can manipulate all the elements.
Any graphics or images can be resized as you see fit. You can also add pictures from your phone to personalize the card.
The message on a greeting card is the most crucial aspect. Therefore, ensure its legible when designing a card on a computer.
Use a large and easy-to-read font for the main text. As for the secondary text, use a smaller, contemporary font.
A font that looks handwritten is often the top choice. Make sure the one you choose is readable. An alternative is a sans-serif font. It can lend a stylish contemporary look to your card.
You can also opt for a calligraphy or script font. They look equally beautiful on greeting cards.
Use a font that’s appropriate for the occasion. For instance, it’s more appropriate to use fancy fonts for a wedding card than a goofy font.
You can use plain printer paper or cardstock to print the card. We recommend you use cardstock, as it’s much sturdier and will allow you to add more decorations. Also, use colour printer ink when printing the card.
If you don’t have a printer at home, visit a local print shop to process your card for a small fee.
Once your card is printed, fold it in half. You can handwrite a message inside the card before sending it out for a more personalized touch.
As you learn how to make greeting cards, there are certain things to keep in mind for an improved experience. These are our top ten tips for making greeting cards:
Learning how to make greeting cards is a fun and exciting journey. You can experiment with different designs and orientations, creating masterpieces that friends and family will appreciate.
Whether you’re making a basic, window, or printed card, decorate as you see fit. And pay attention to all details, including the message.
If you want to learn more about how to make greeting cards, you can take a 1:1 lesson from an online tutor. This will help you cover all the basics associated with it and give you the skills to make fantastic greeting cards.
Lrnkey, an online tutoring platform, offers online tutorials for beginners and advanced artists. These one-on-one lessons hosted by expert tutors help you learn everything there is to know about making greeting cards.
The cardstock weight used for a standard greeting card ranges from 80 to 100 pounds. However, different weights of cardstock can be used to make greeting cards, depending on the look and feel you are going for.
Heavier cardstocks, such as 110 lb., will give your cards a sturdier feel and show less wear over time. Lighter cardstocks, such as 80 lb., are better suited for intricate designs or for use with embellishments because they are less likely to warp or tear. Ultimately, it’s up to the crafter’s preference which cardstock weight to use.
You could add a music box to your greeting card in several ways. One way would be to find a music box that is the same size as a greeting card and attach it to the inside of the card. Another way would be to create a small pocket on the front or back of the card and put the music box in there. Lastly, you could also create a hole in the center of the greeting card and put the music box string through it so that the music plays when you open up the card.
To add a pop-up to your paper greeting card, you’ll need to purchase some specialty paper and a pop-up mechanism. First, cut out the shape of the pop-up from the specialty paper. Then, using the pop-up mechanism as a guide, make corresponding cuts in the card itself. Finally, fold along the pre-cut lines and secure them in place with adhesive.
You could also purchase a pop-up card kit. Using the template provided with the kit, fold the paper along the indicated lines. Finally, use glue or double-sided tape to attach the shape to the inside of your card. Your recipient will be amazed when they open your card, and the pop-up jumps up.
There are a few ways to use washi tape when making paper greeting cards. One way is to simply wrap the tape around the card itself, either horizontally or vertically. You can also use it to create stripes or patterns on the front of the card or even decorate the edges.
Some people like to cut out shapes from washi tape and attach them to the front of the card or use it as a border around the edge. Whichever way you use it, washi tape adds a unique and attractive touch that can really dress up a simple paper greeting card.


Explore more than 500+ high-income skills
Practice with experienced tutors
Book your first free lessonAre you a robot?