Preply vs Cambly (2026): An Honest Comparison for Language Learners
Preply vs Cambly: we break down pricing, tutor quality & lesson structure — then reveal a smarter alternative for serious learners.
Create a student account
Lrnkey
Mar 13, 2022Explore more than 500+ high-income skills with highly motivated tutors
Are you looking to learn to make paper crafts for beginners? You are at the right article. Papercraft is a fun and creative hobby that can keep you and your kids busy for summer. They are easy to learn and require just paper and glue to get started.
Paper crafting is an exciting hobby. You can make beautiful pieces for decorating your home. And it’s a great present to give to your loved ones. When you are looking to learn to make paper crafts for beginners, you can try making greeting cards or a scrapbook. Learning origami and paper mache would help you create beautiful centerpieces for your home.
Paper is versatile, with diverse texture, color, and size options. You can cut a piece of paper to create a three-dimensional design or use stamps to create an exciting papercraft. There are limitless options when it comes to paper crafting.
In this article, you will learn to make paper crafts for beginners. We’ll discuss some of the easiest and most creative crafts you can do with paper, a pair of scissors, and glue.
Papercraft combines different creative art forms, including paper as the critical artistic medium. In simple terms, paper crafting is making objects out of paper. Everyone has experience with the paper, making paper crafting an approachable craft.
This type of art form is relatively inexpensive and easy to learn. When you’re looking to learn to make paper crafts for beginners, you can try out techniques that are faster to learn. You can then move on to more complex paper crafts like origami.
Paper can be cut and molded into different shapes to create unique designs. Many artists use creative management platforms to organize ideas and speed up the process. This includes both 2D and 3D crafts. You can cut, roll, fold, or shred your paper to create unique designs.
There are multiple reasons you should learn to make paper crafts for beginners.
Paper folding is one of the most accessible and most popular forms of paper crafting. You can start with simple designs. This is best to try out while looking to learn to make paper crafts for beginners. The best part about paper folding is it is not messy and requires just paper and a workspace.
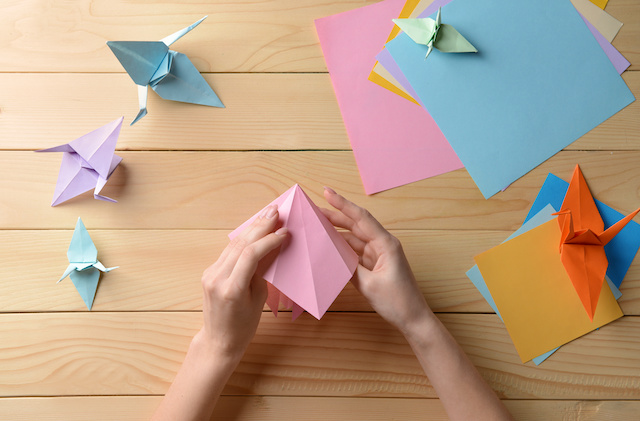
Origami is the Japanese art of paper folding. It is usually used to make paper cranes and flowers. The goal of Origami is to convert a flat sheet of paper into a sculpture by using different folding and sculpting techniques.
Zhezhi is the Chinese art of paper folding. The art form originated in medieval China. This usually focuses on transforming a flat sheet of paper into boats and hats.
Jong-i jeobgi is the Korean art of paper folding. This craft is taught to schoolchildren as part of their science, Math, and history lessons. Paper crafting is an essential part of Korean culture. Hanji is a particular type of paper used for traditional Korean papercrafts.
As the name suggests, Western paper folding is common throughout Europe and the United States. It is a common type of papercraft technique used to make simple crafts like boats and aeroplanes.
Like paper folding, some different designs and aesthetics are involved with paper cutting. These differ from region to region. When you are looking to learn to make paper crafts for beginners, learning paper cutting is a good idea. Over the years, different geographic areas have developed their distinctive style.
Chinese paper cutting dates back to the 2nd century CE when paper was invented. When paper became more accessible to people, paper cutting was one of the most popular forms of Chinese folk art. The entire town is decorated with bright red paper cuttings during Chinese festivals. They are usually done with the help of a scissor or craft knife.
Wycinanki is the Slavic version of paper cutting. It is a popular craft form in Poland, Belarus, and Ukraine. Paper is transformed into decorative items using various techniques, including paper clipping, tearing, and punching. Artists cut paper to make different designs, including peacocks, flowers, and medallions.
Papel Picado is popular Mexican folk art. This decorative craft is made by cutting elaborate designs into sheets of tissue paper. The designs in this art form are cut by stacking over 50 sheets of colourful tissue paper. Artists use them as a guide to using chisels or craft knives to cut paper and make colourful banners.
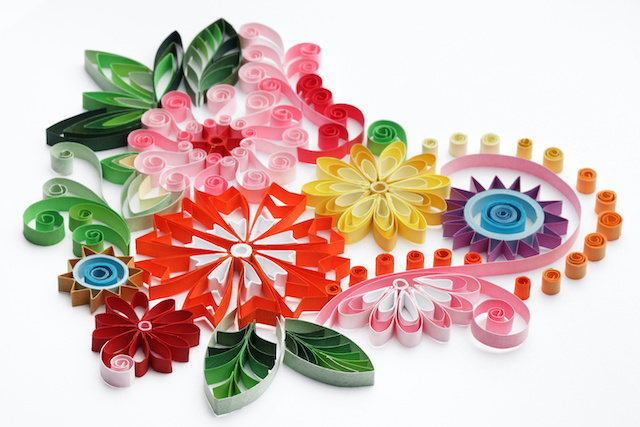
Paper quilling is a unique art form that you can try out while looking to learn to make paper crafts for beginners. This is another traditional craft form that is used to decorate monasteries. Paper quilling is also used to create beautiful book covers and adorn religious items. Artists use quillers, crimpers, and tweezers to manipulate the rolled paper into different shapes.
Creating a paper model can be quite a fun task. You can draw from different craft ideas, create small paper objects, and glue them together to make a unique paper model. It acts as an excellent centrepiece for your dining hall. Depending upon your design, you can use coloured sheets of paper or paint them once you are done sticking them together.
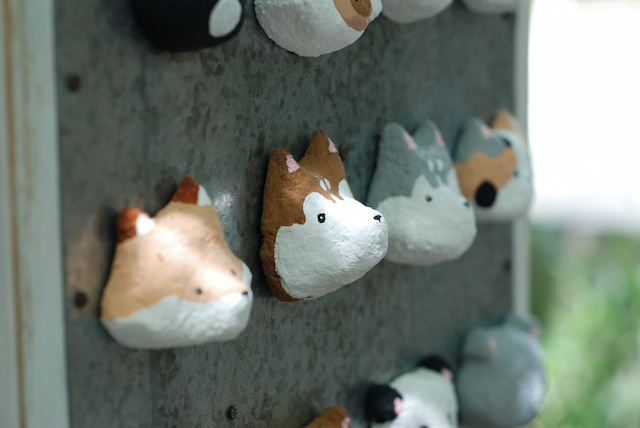
Paper pulp crafts have been around for hundreds of years. It is also known as paper mache. People used these crafts to strengthen their swords in traditional times. Today, this craft is used for making different types of objects that are sturdy enough for decorative items. Some artists also use paper pulp craft as a part of their paintings.
Find a tutor for this topic
When you are looking to learn to make paper crafts for beginners, there are multiple techniques you can try out. While some are as easy as cutting and pasting different paper shapes, others require intricate folding. You can start with more straightforward techniques and practice them. Once you are comfortable, you can move on to more complex designs.
In this section of learning to make paper crafts for beginners, we will discuss multiple first projects that you can take up.
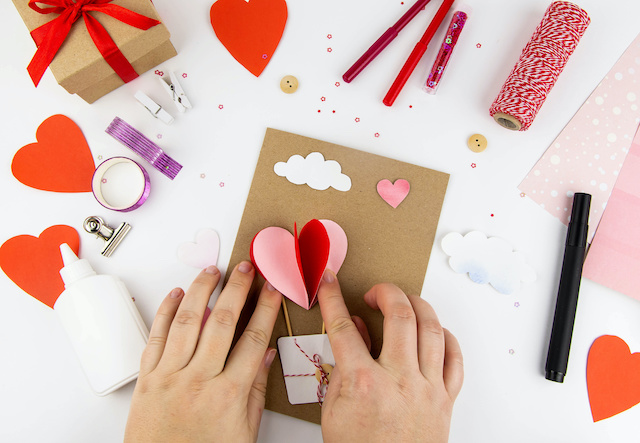
Everyone loves accepting a handmade greeting card on a special occasion, from children to adults. These are easy to make and convey a gesture of love and care. While looking to learn to make paper crafts for beginners, you should try making greeting cards.
You’ll need a cutting mat, card stock, and craft knife for a simple greeting card. You’ll also need some decorative items, pencils, and a blunt piece of metal for scoring.
Here is how you can make greeting cards while looking to learn to make paper crafts for beginners.
You have made a creative yet straightforward card for your loved ones.
Once you know how to make a simple greeting card, you can now advance to a little complex and creative card. This particular technique creates a unique design that is perfect for anniversaries, birthdays, or marriages.
For a window greeting card, you’ll need a cutting mat and two pieces of cardstocks. You will also need a pair of scissors, decorations, a ruler, a blunt piece of metal and an HB pencil. Here is how you can make a window greeting card while looking to learn to make paper crafts for beginners.
Your window greeting card is now ready.
Scrapbooks are very popular among children and adults. They can be created for someone’s birthday, incorporating special memories. Some prefer making a travel scrapbook or a journal for themselves. Making a scrapbook is easy and fun.
You’ll need a scrapbook binder, pages, photos, markers, and highlighters for making a scrapbook. And you will also need a pair of scissors, decorative tape, and a glue stick. Here is how you can make a scrapbook while looking to learn to make paper crafts for beginners.
Your scrapbook is now ready.
Stamping can be an easy way to decorate any project, add personalized branding, mark office materials, or speed up tedious processes. Here is how you can quickly try out stamping crafts while learning paper crafts techniques.
Paper mache is an antique paper crafting technique that soldiers used to strengthen their swords. Now it is a popular molding technique among artists. You will need to create a paper mache paste before proceeding with the craft.
For making paper mache paste, you will need a sealable plastic bag, flour, water, and salt. Here is how you can make paper mache paste while looking to learn to make paper crafts for beginners.
Once your paper mache paste is ready, you can now start moulding your mask. You will need paper mache paste, paper strips, a balloon, scissors, and paints. Here is how you can make a paper mache mask while looking to learn to make paper crafts for beginners.
Your paper mache mask is now ready.
Flipbooks have been around for hundreds of years and were the first animation techniques used by artists. Flipbook is a booklet with a series of images. These images gradually change, making it look like the illustration is moving.
You’ll need blank index cards, glue, and coloured pens and pencils to make a flipbook. You will also need binder clips, an HB pencil, and an Eraser. Here is how you can make a flipbook while looking to learn to make paper crafts for beginners.
Pop-up books have always fascinated me with the interesting 3D images and creative plot lines. They add an exciting new dimension to your book. Here is how you can create a pop-up book while learning papercrafts.
Your square pop-ups are ready. You can attach any character illustration to these cards. These will then be added to your book to create a 3D look.
Origami is a popular Japanese art of paper folding. This craft is popular among both adults and children. You can make simple animal figures or complex creatures by folding a single sheet of paper with different techniques.
For making an origami frog, you’ll need a square piece of paper. Here is how you can make an origami frog while looking to learn to make paper crafts for beginners.
Your origami frog is now ready.
Once you have learned origami’s basic folding techniques, you should try more elaborate figurines. This will help you practice your techniques. For making an origami crane, you’ll need a square piece of paper. Here is how you can make an origami crane while looking to learn to make paper crafts for beginners.
Fold the bottom tip of the top flap to the top corner. Flip your paper and repeat it on the other side.
Your origami crane is now ready. You can present it as a gift or hang them up as decorations in your house.
Paper crafting is all about learning through trial and error. Although it is one of the most enjoyable and easiest crafts, it can be tricky. When you are looking to learn to make paper crafts for beginners, you should keep a few tips in mind.
Scoring or folding the paper perfectly to create proper fold lines is one of the bases of paper crafting. To make neat paper cuttings and fold, you should learn to score your paper correctly.
For this, you will need a straight ruler and a bone folder. A bone folder is a popular crafting tool made out of plastic and has a pointed tip at the end. This helps make scoring your paper easier and neater.
Cutting mats are your furniture’s savior. But you will notice that your paper stops sticking after a time. This is because the fibers of the paper and debris stick to your mat. It creates a layer that does not let your paper stick to it.
Instead of buying cutting mats, again and again, you can try cleaning them up with mild soap and water. This will fix your problem. If not, you can buy a repositionable tack spray from your craft store and spray it on the surface.
If you’re using slippery paper sheets to create paper crafts, you might find it difficult to stick them to the mat. You can use adhesive tape and stick the upper two corners of the sheet to keep it in place. This is one of the most helpful tips when looking to learn to make paper crafts for beginners.
When you are around paper and are trying to make a craft out of it, you will get paper cuts. Your fingers are one of the most sensitive parts of your body. Make sure you take preventive measures to stay away from paper cuts. Remember not to drag your hands along the edges of the paper sheet.
If you are too prone to papercuts, you can also invest in a pair of crafters gloves. It would be best always to have a box of band-aid and antibiotic solutions on your desk. This will help you tackle your cut instantly.
Creating paper crafts is a fun task. You can try out different techniques and stick with the one you like the most. While looking to learn to make paper crafts for beginners, you should start with the basic techniques. You can then later advance to the complicated ones.
If you want to learn more about paper crafts, you can take a 1:1 lesson from an online tutor. This will help you be clear with the basic techniques and the small tips and tricks.
Lrnkey, an online tutoring platform, offers online tutorials for beginners and advanced artists. These one-on-one lessons hosted by expert tutors help you learn everything there is about making papercrafts.
Now go on and try to implement what you learned in this guide on learning to make paper crafts for beginners. Let us know your experience in the comment section below.
Paper crafts is an essential skill, which you should teach your children. This helps them explore the creative side of their mind. Additionally, it is a fun activity that can help you bond with your kids. When you are looking to learn to make paper crafts for beginners, you can try out these activities.
When you are looking to learn to make paper crafts for beginners, you need a few essential tools. These will help you try out different techniques.
When you are starting to learn to make paper crafts for beginners, it’s always advisable to invest in good-quality materials. The best origami paper is standard origami paper, also known as Kami. You can find these papers online or at high-end craft stores.
If you have left more significant gaps in your paper mache, which looks unflattering to you, you can sand them out. For this, you need to let your paper mache project dry out completely. Once it’s hard, you can use fine grid sandpaper to smoothen out the rough edges. This gives you a smooth base to paint on.


Explore more than 500+ high-income skills
Practice with experienced tutors
Book your first free lessonLrnkey AI Agent
Let’s personalize your support experience.
Are you a robot?